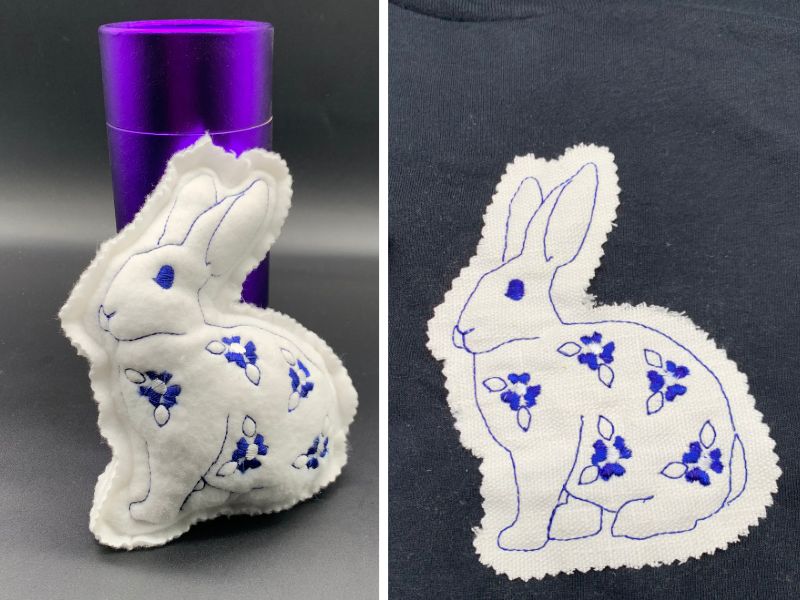
Looking for a fun and creative embroidery project? In this tutorial, we’ll show you how to create a beautiful Delft-style bunny using Design Doodler!
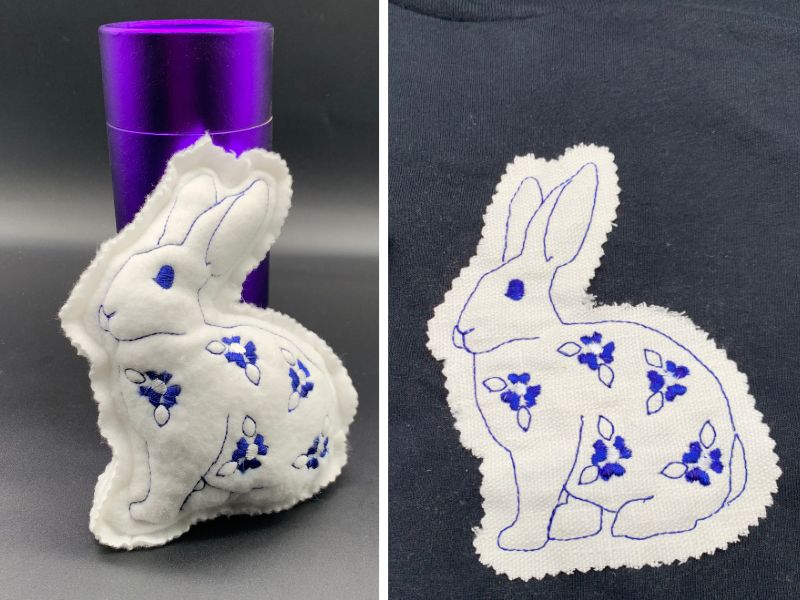
With a mix of simple shapes, clever stitching techniques, and a time-saving trick for adding floral details, you’ll bring this charming design to life in no time. Whether you’re making a decorative piece or a heartfelt gift, this project is easy, fun, and full of character. Let’s get started!
Materials for Bunny:
- Design Doodler
- New to the Doodler? Give the free Design Doodler demo a try, and start creating your own embroidery designs! While you won’t be able to stitch them out, it’s a great way to explore all the features and get a feel for what’s possible. Includes 5 video lessons!
- For artwork, download the file below.
Raw Edge Bunny Materials
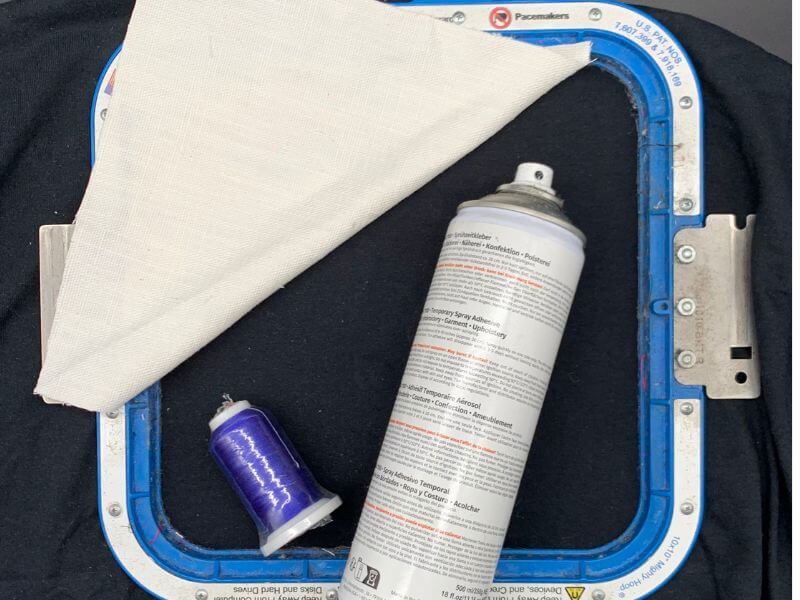
- A t-shirt hooped with lightweight stabilizer
- An 8×8 inch piece of woven fabric (woven fabric will create a dramatic raw edge)
- Delft blue and white embroidery thread
Stuffed Bunny Materials
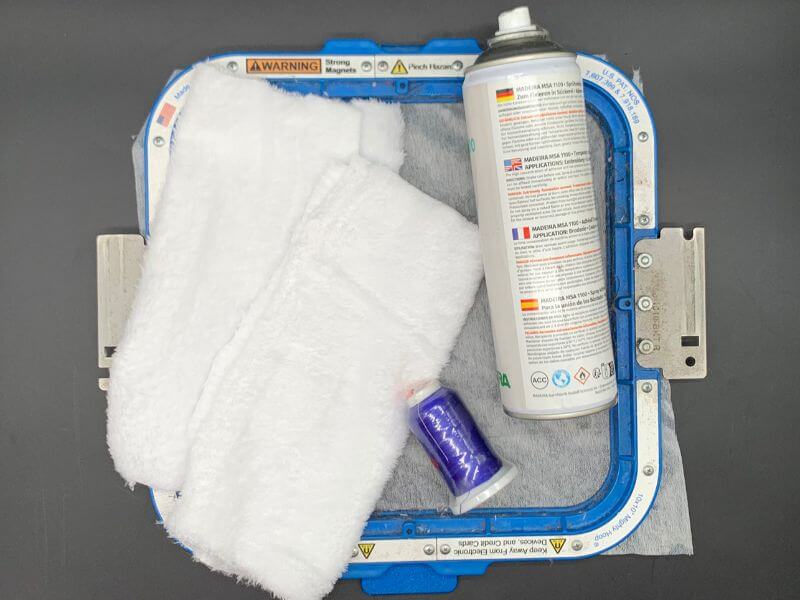
- Two 8×8 inch squares of white fleece
- Temporary embroidery spray
- Lightweight cutaway stabilizer
- Polyester stuffing
- Delft blue and white embroidery thread
Creating An Embroidered Bunny on the Design Doodler
We’re going to teach you a time-saving technique! Instead of creating each flower individually, we’ll use one set of flowers and simply copy and paste them into the bunny’s body.
It’s a quick and easy process using basic shapes, and you can rotate them with the click of a button. Plus, we’ll keep things simple with just one stitch-out for the shirt—just press ‘go’ and enjoy the adorable result!
Insert your artwork.
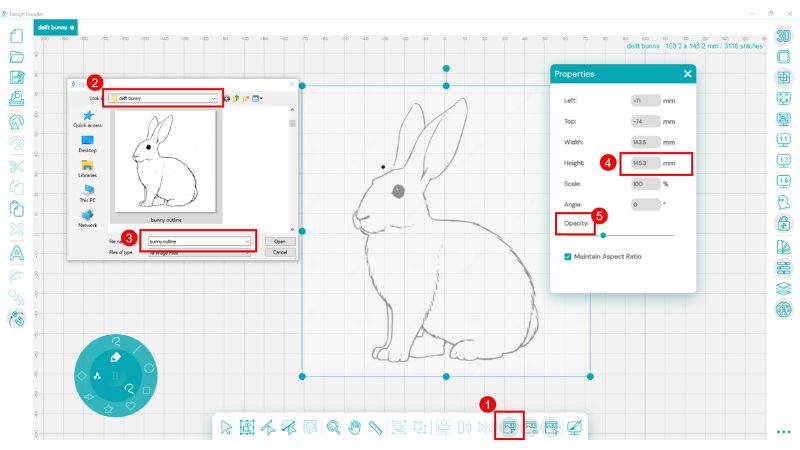
- Select the “insert backdrop” icon.
- Navigate to your file.
- Select and open your file.
- Size to 145X145 mm.
- Adjust the opacity if you desire. Some find that this helps them to see the digitized lines more easily.
Begin by Digitizing the outline as shown:
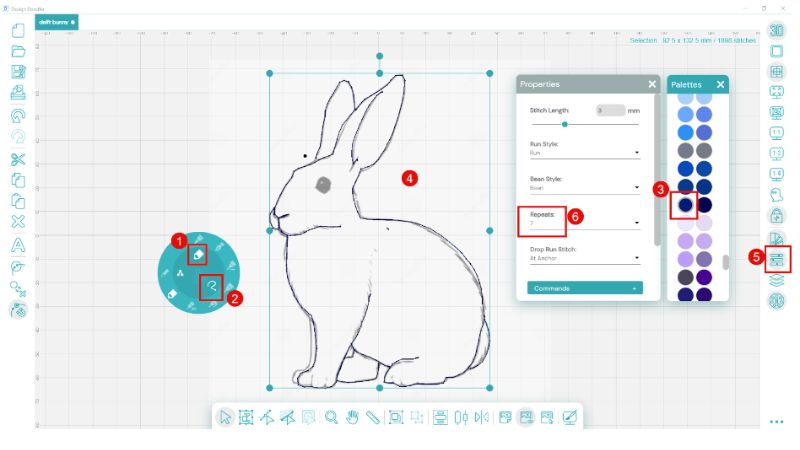
- Select the Run Bean brush.
- Choose the freeform option.
- We are using a delft blue (but be creative!).
- Digitize the lines; we opted not to use the second leg. Please note you do not have to create a jagged fur-like line. Smooth lines will work perfectly.
- To make the line more bold choose properties.
- Set repeats to 7 passes.
Once you have your outline, let’s create a flower unit. We will start with the petals using the heart shape and a center round then create outlined leaves
Start with the trefoil heart-shaped leaves.
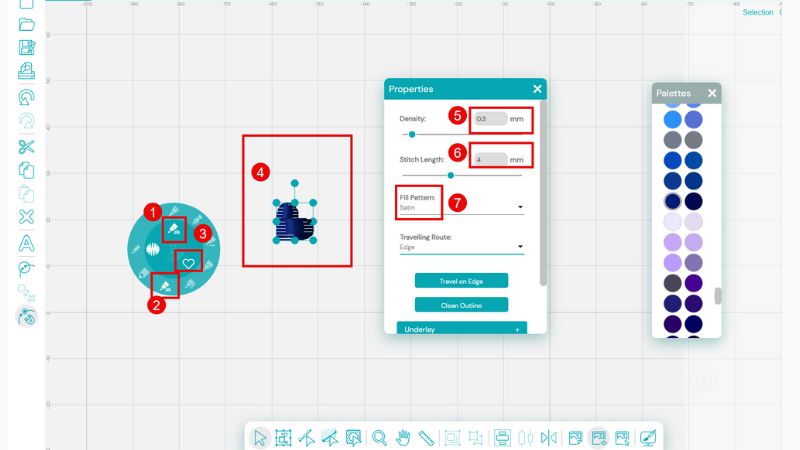
- Select the fill brush.
- Choose fill closed object.
- Under the line, type selection, choose the preset heart.
- Create a heart 7.5 mm square.
- Using the Properties tab, change the density of the selected heart to .35 mm.
- Set the stitch length to 4 mm.
- Use fill pattern satin.
Copy and paste the heart.
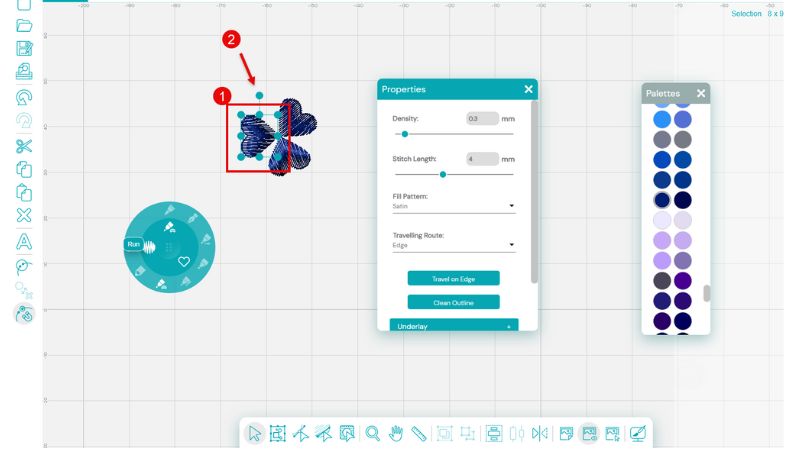
- After selecting your heart, copy it and paste it into place.
- Select the pasted heart (the copy) and move it into position.
- Use the rotation handle to rotate the heart to the correct position, as shown by the diagram above.
- Create a 3 petaled flower.
Add the center of the heart.
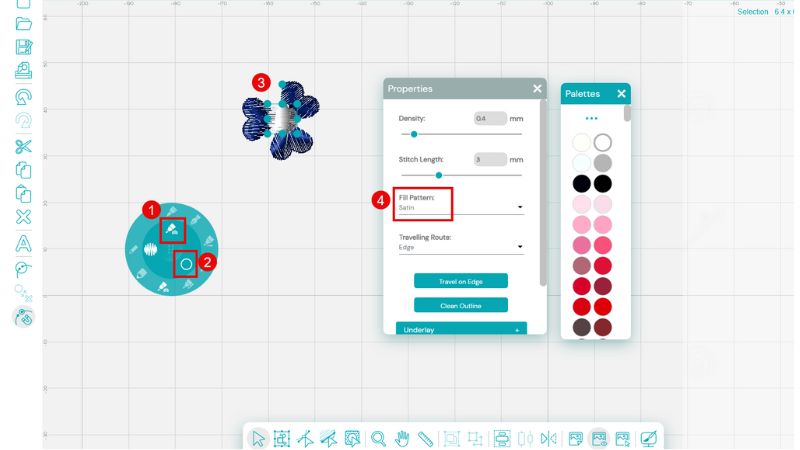
- Select the fill brush, using a closed object.
- Choose the circle option for the line type.
- Draw your circle (we used white) approximately 5X5 mm.
- Select fill pattern satin.
Let’s create a leaf! We will use a diamond shape but change the type of nodes on two sides.
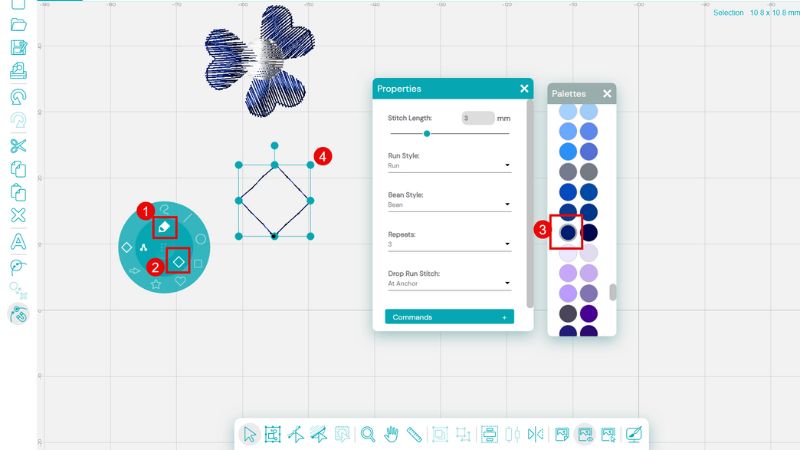
- Select the run bean brush (the triple pass run stitch).
- Choose the diamond preset shape line type.
- We chose blue stitching.
To create two curved sides, we adjust two nodes…
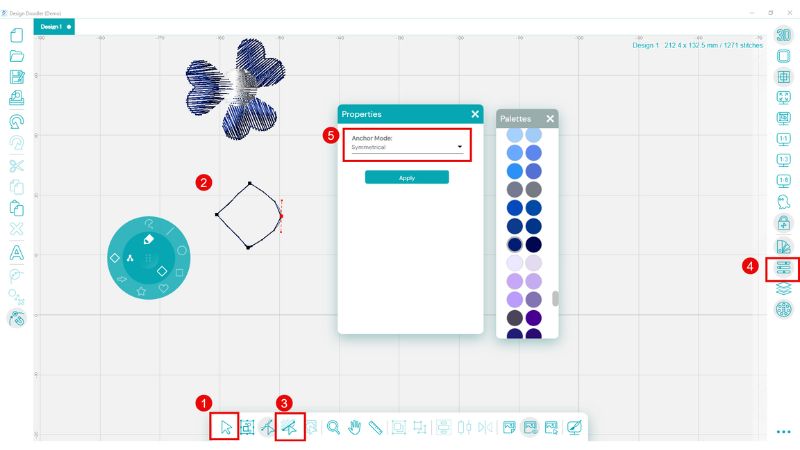
- Select your diamond shape.
- To select nodes choose the path edit tool (nodes will appear in each corner).
- Select the Right node.
- On the Right side of the screen, select the Properties tool (a box will appear).
- After selecting change the node type to symmetrical which will create a “round” or curved node.
- Repeat the process with the left node. Note that you can move the right and left nodes closer or farther apart to create skinny or fat leaves.
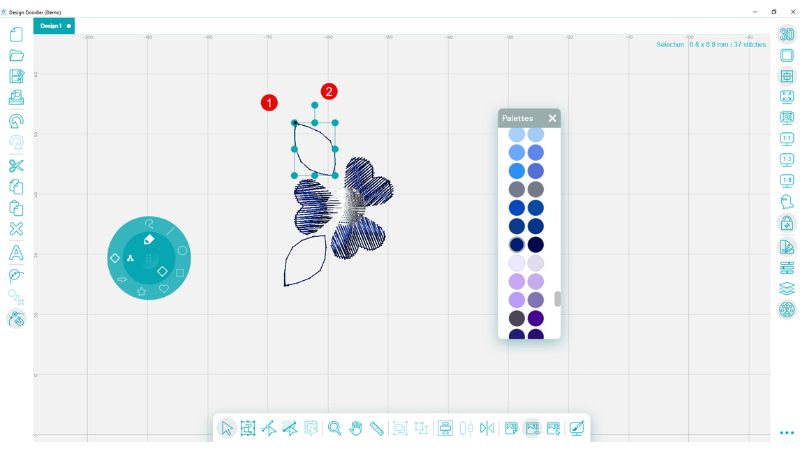
Copy and paste the leaf twice using the above method, then place it as in the diagram. Use the rotating arm to rotate it to the desired position.
We now have a complete flower unit which we will copy and paste to insert into our bunny.
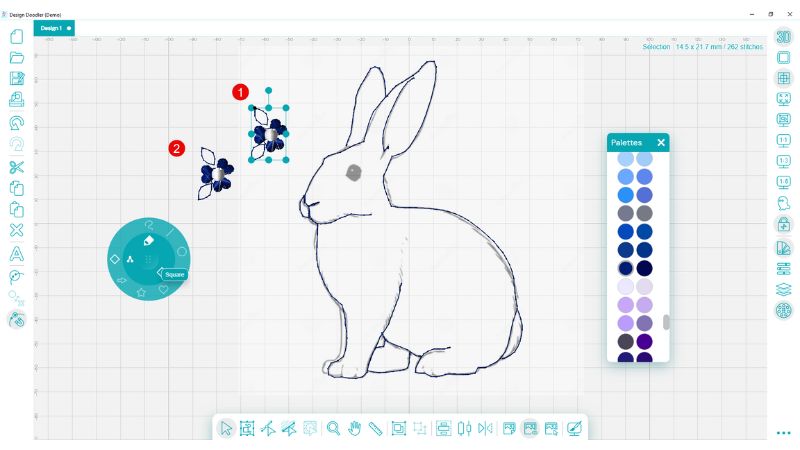
- Select the flower unit and copy.
- Paste the flower unit and click and drag away from the first unit.
- While still highlighted, you will drag this into place on the bunny and use the rotation arm to adjust it to the desired position.
We used 5 flower units in our bunny- the Last remaining unit you can select, drag and place.
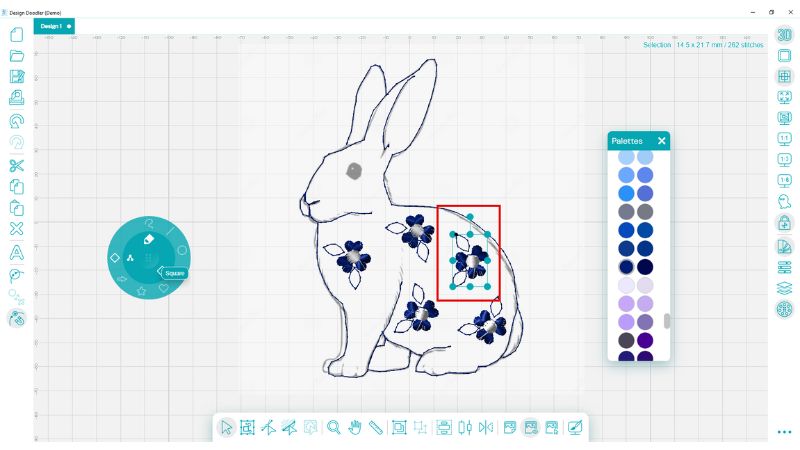
Create the eye.
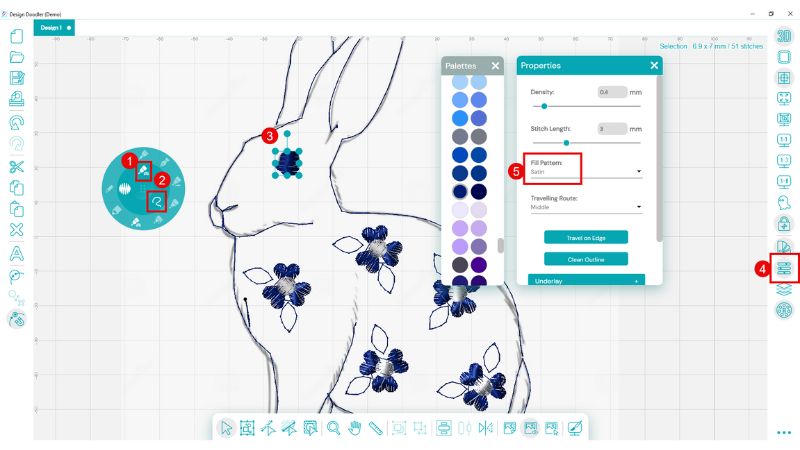
- Select the fill brush.
- Choose the freeform option.
- Draw around the eye.
- Open the properties tool.
- With the eye selected, change to satin.
If you want to create the stuffed bunny, proceed with the next step below.
If you want to embroider the bunny on a shirt, skip this next step (you’re done!) and save your design.
To create the optional outline for the stuffed bunny, use these steps:
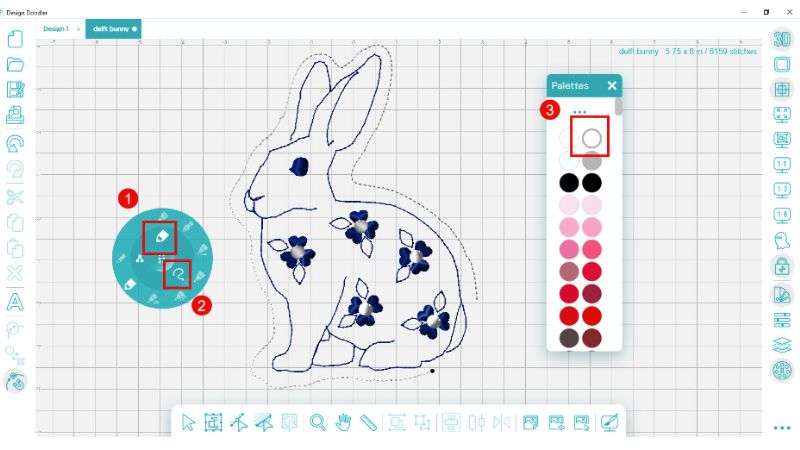
- Select the run bean stitch.
- Choose the freeform line tool.
- Select white thread (this will not show on the white fleece).
- Draw your outline. This will not be a closed outline. You will need an opening to insert the batting.
Save your file.
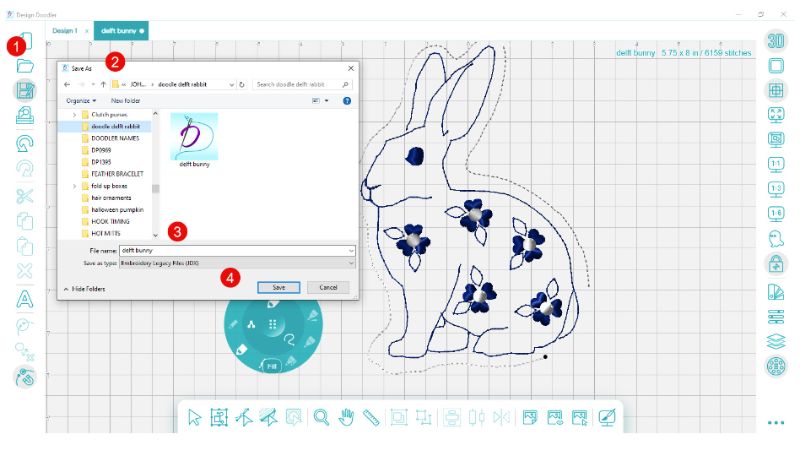
- Choose the Save File tool.
- Navigate to the place you want to save your file.
- Name your file.
- Hit save!
Embroidering Your Bunny
Embroidering Your Shirt With A Bunny

Hoop your t-shirt with a medium or lightweight stabilizer. Lightly spray some temporary embroidery adhesive and secure a piece of woven fabric within the hoop, ensuring it’s firmly in place.
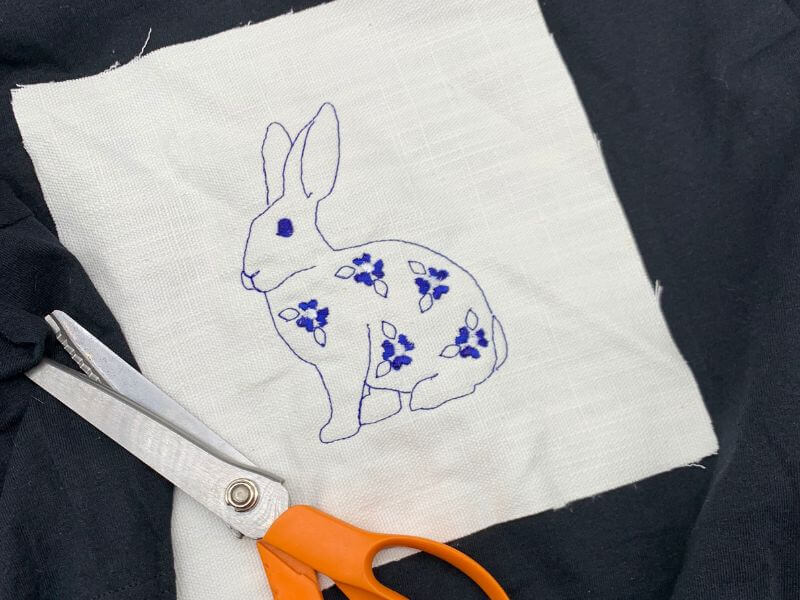
Stitch out your design, then trim the edges to about ¼ inch using pinking shears or regular scissors for a clean finish.
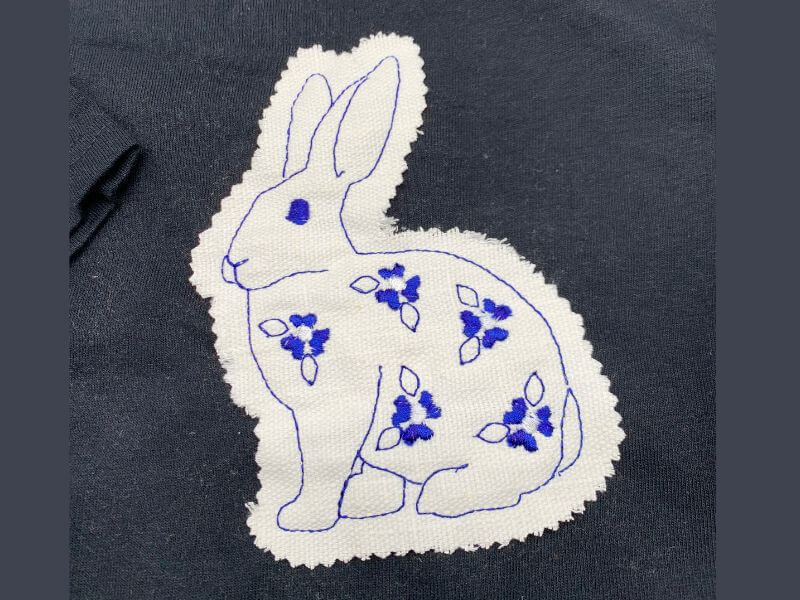
Feel free to fray the edges for a relaxed look. Over time, the edges will naturally soften and fray even more as the shirt is washed.
Trim your stabilizer.
Embroidering A Stuffed Bunny
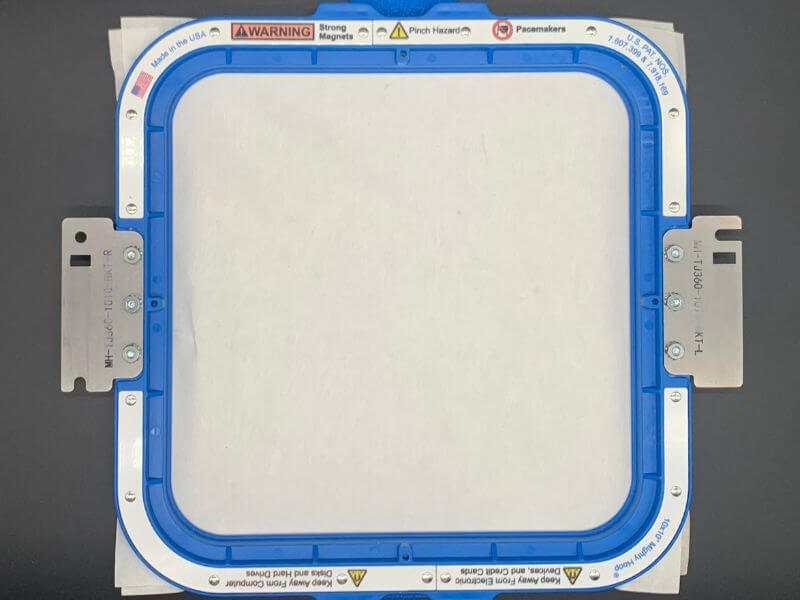
Hoop a piece of lightweight stabilizer.
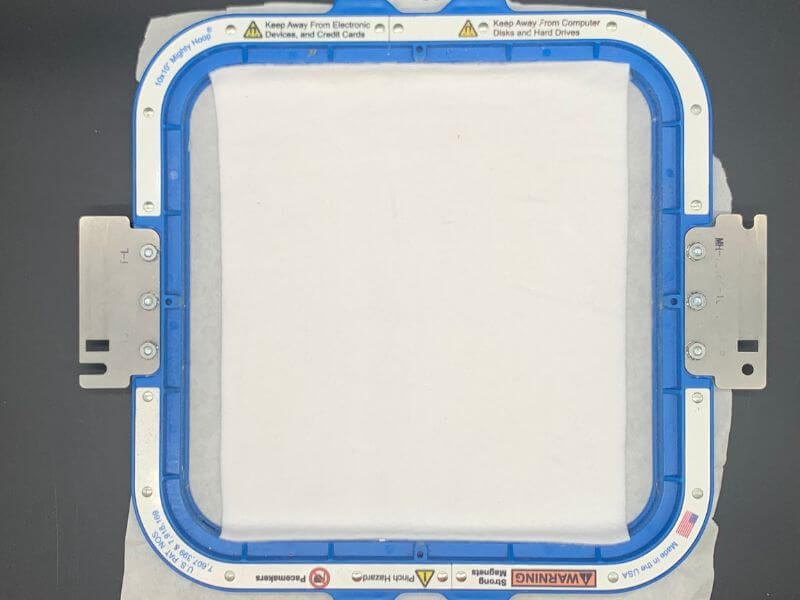
Lightly spray temporary adhesive onto the stabilizer, then place a piece of fleece material in the hoop, ensuring it stays secure.
Insert the hoop into your machine and stitch through the white flower centers, stopping just before the final outline.
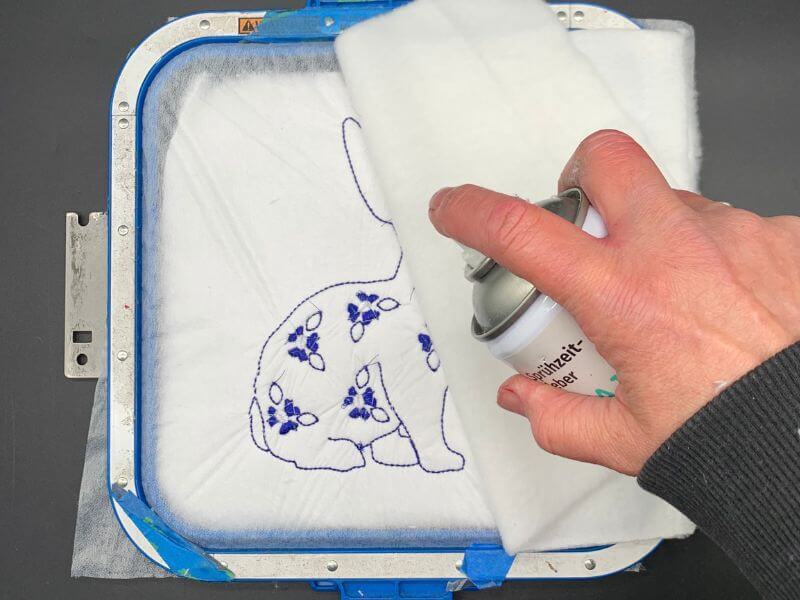
Remove the hoop and place it face down on a flat surface.
(Note: This is the back side of the bunny stitching.) Secure the second piece of fleece to the back of the hoop using temporary spray adhesive and/or masking tape.
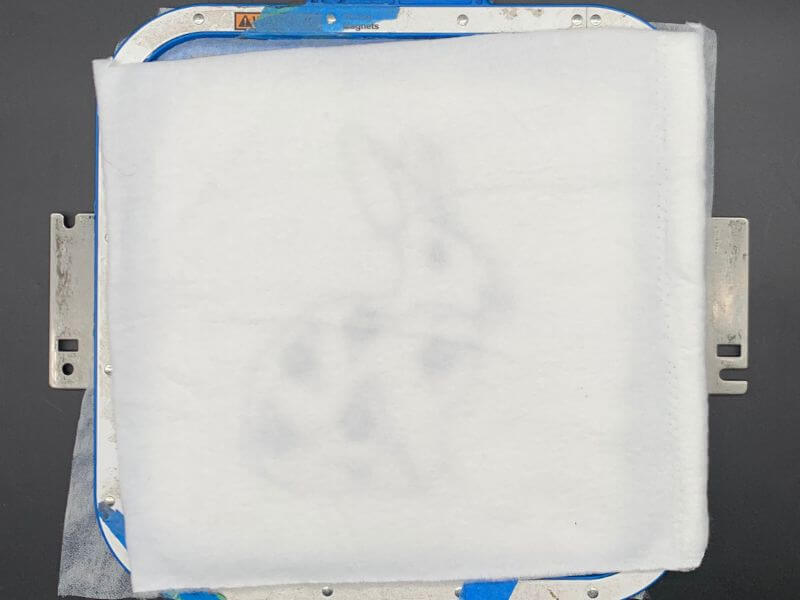
Insert the hoop back into the machine and stitch the final outline.
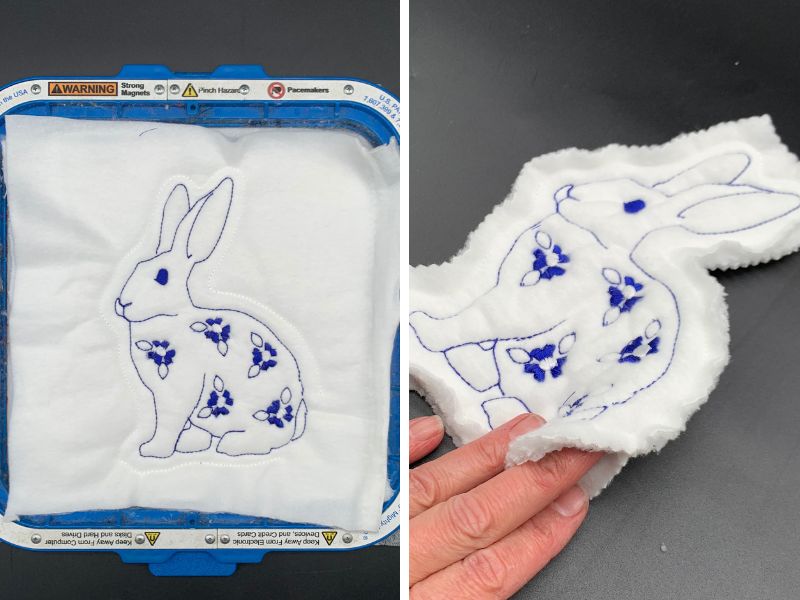
Remove the design from the hoop and trim the edges to approximately ¼ inch.
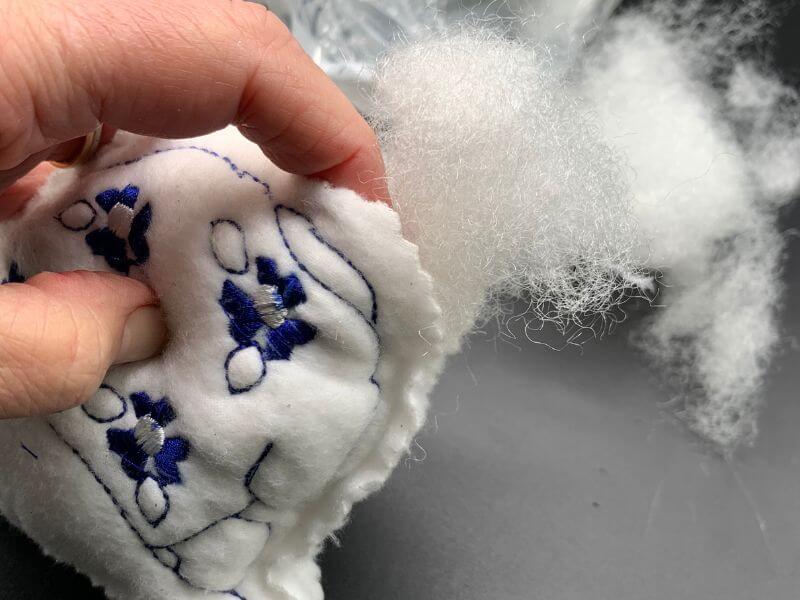
Stuff the bunny with polyester batting. Use chopsticks or a large screwdriver to help fill the ears evenly.
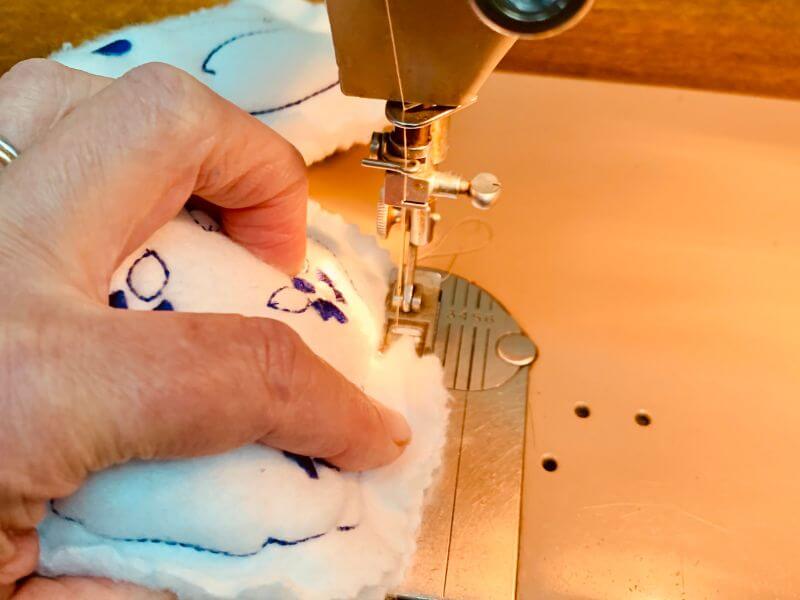
Close the opening by either hand-stitching or using a sewing machine for a secure finish.
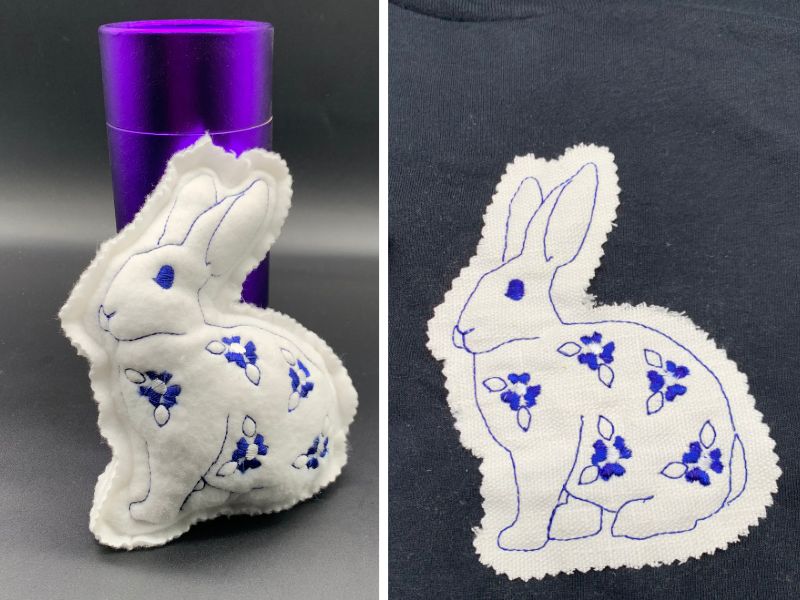
With just a few simple steps, you’ve created a charming Delft-style bunny using Design Doodler! This project is a great way to experiment with layering fabrics, stitching techniques, and creative placement. Whether you keep it as a decorative piece or gift it to someone special, the unique frayed edges and soft texture will add to its charm over time. We hope you enjoyed this tutorial.
happy stitching!
