Need a cute and practical way to keep your sewing supplies handy? This Sew On the Go Kit is the perfect little project! Whether you’re making it as a thoughtful gift for your favorite sewer or just want something easy to toss in your bag, this fold-up sewing kit has you covered.
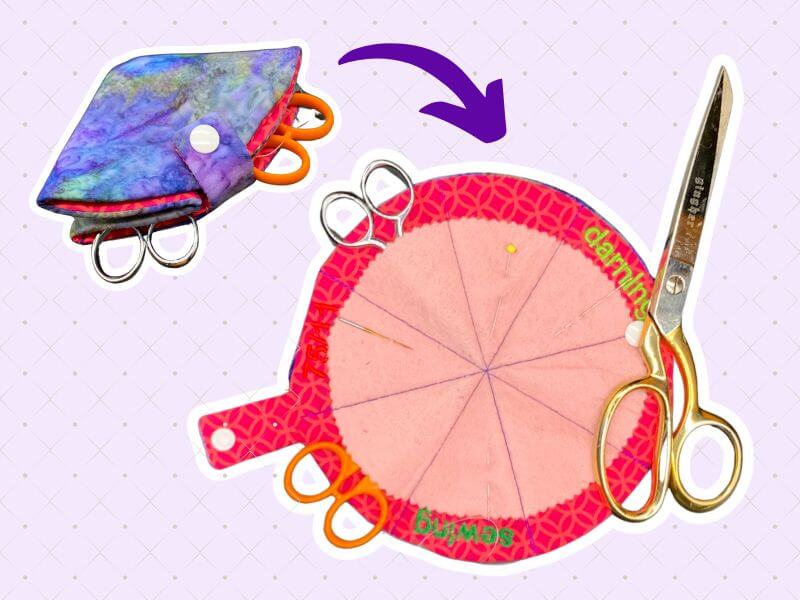
In this blog, I’ll walk you through step-by-step instructions to create your own using the Design Doodler program—artwork included! It’s a fun and functional project you’ll use again and again.
Materials for Sew On The Go Kit:
- Design Doodler software or other digitizing software
- New to the Doodler? Give the free Design Doodler demo a try, and start creating your own embroidery designs! While you won’t be able to stitch them out, it’s a great way to explore all the features and get a feel for what’s possible. Includes 5 video lessons!
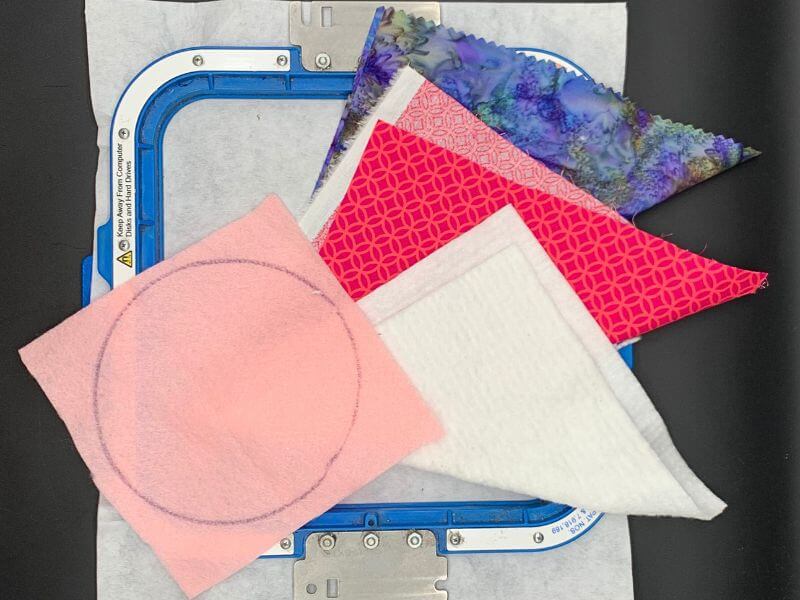
- 10-inch square of cotton cloth (color 1)
- 10-inch square of cotton cloth (color 2)
- 10-inch square of thin quilt batting
- 8-inch square of felt
- Hooped stabilizer in a 10-inch hoop
- Artwork
Download Printable Circle Here
Digitizing a Sew On The Go Kit:
Step 1: Insert artwork
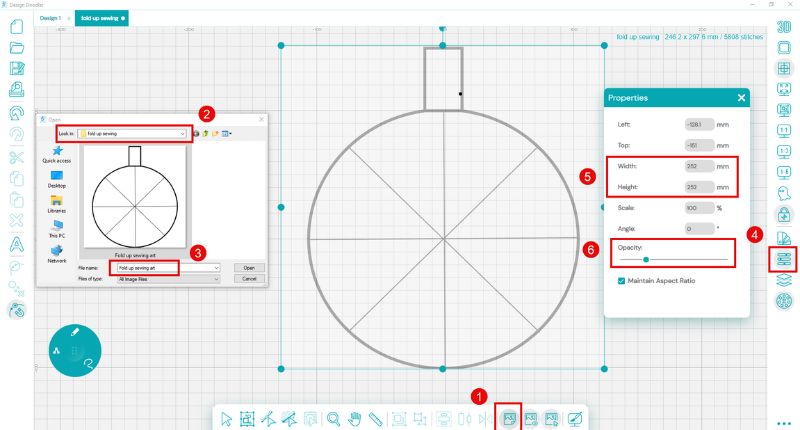
- Click the Insert Backdrop tool
- Navigate to your file location
- Select your artwork
- Open the Properties tool
- Set your size to 250×250 mm
Step 2: Create your outline
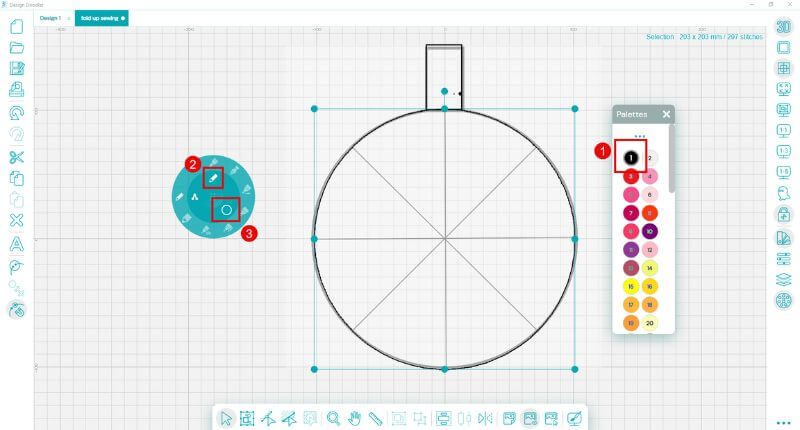
- Set a color
- Choose the run brush
- Select the circle option
Step 3: Create your lettering
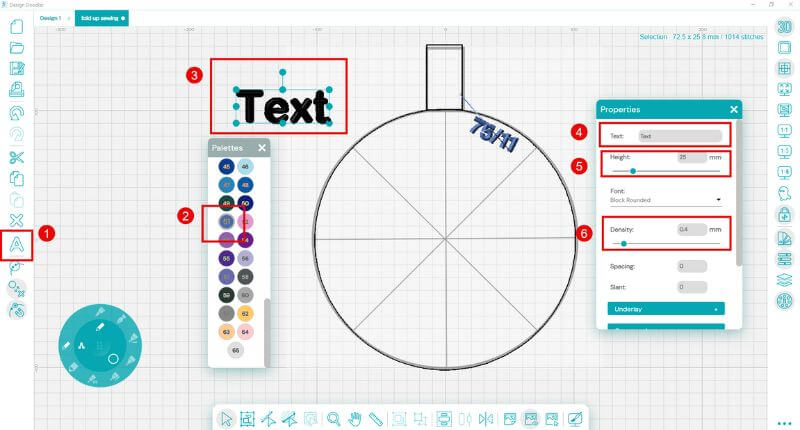
- Select the Lettering Tool
- Choose a color
- A box will appear which says “Text”
- Open the properties tool- under the Text option enter your text 10 inches
- Set your size- We used 20 mm
- Set density to .3 or .4mm
Step 4: Create your felt tack down
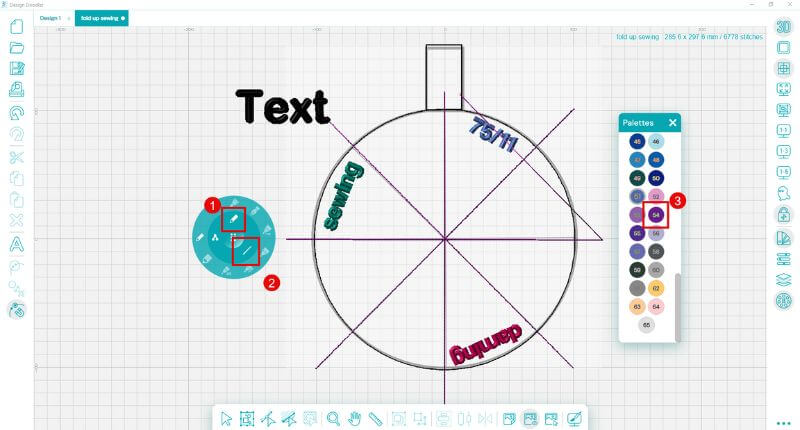
- Choose the Run brush
- Choose the line option
Step 5: Create your final stitch line
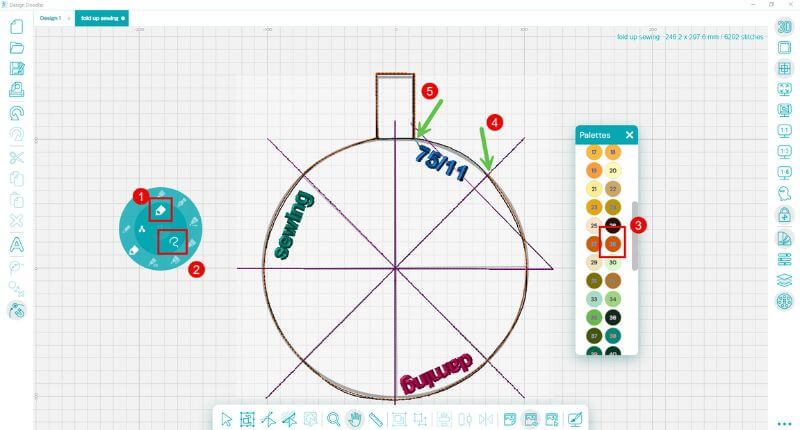
We’ll digitize the entire sewing kit; however, we’ll leave an opening so we can turn this inside out. Start at arrow four and stop at arrow five.
- Select the Run Beam tool in the widget
- Choose the free draw tool
- Start at #4
- Stop at #5
It’s time to put your handy-dandy sewing kit together!
Embroidering Your Sew On The Go Kit:
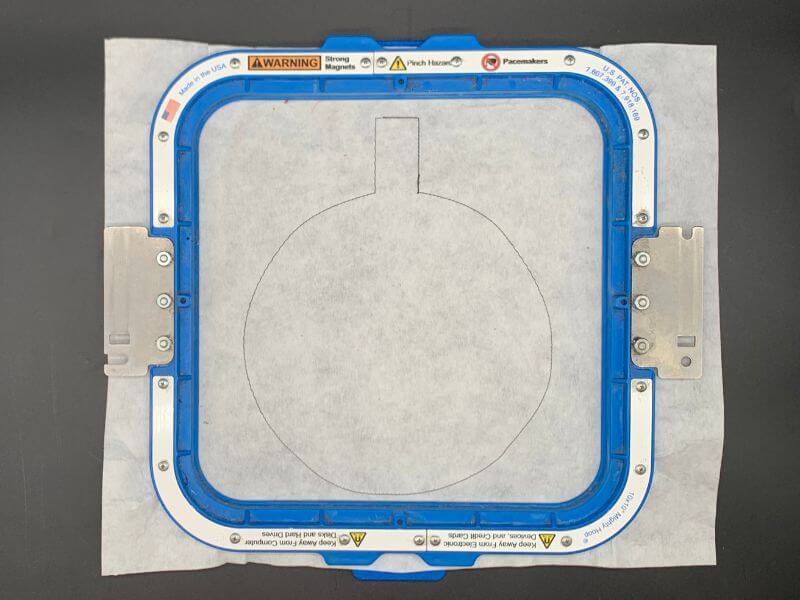
Step 1: Hoop your stabilizer and then sew out the placement line.
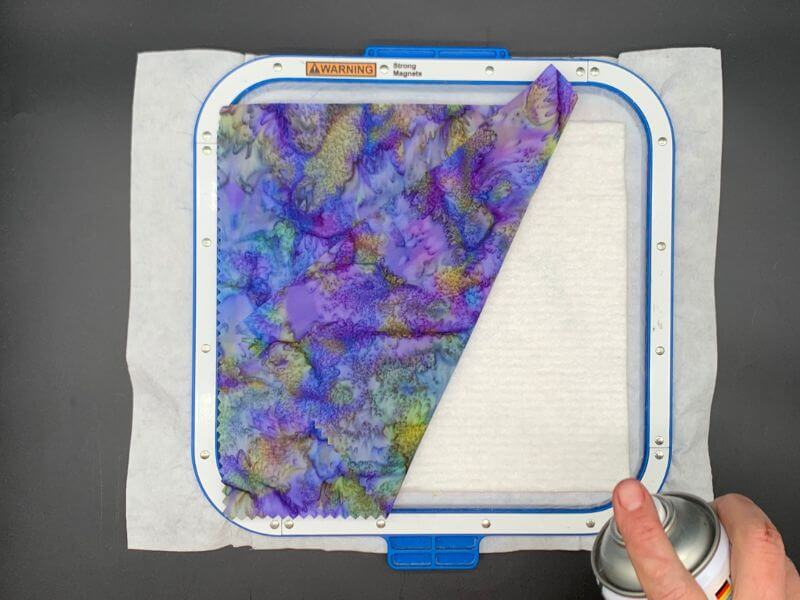
Step 2: Lay down batting and color 1. Use some spray tack to secure if necessary.
Step 3: Stitch your outline, then add your lettering.
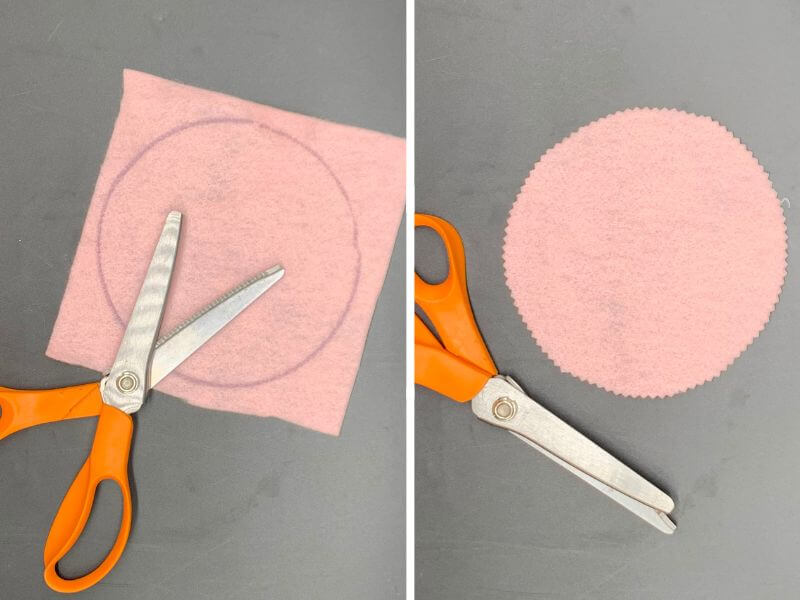
Step 4: Print your 8 inch circle template. Use the template to trim the felt circle. If you wish, you can use a marker or fabric pencil, and you can turn the felt piece over to hide the marking.
Step 5: Lay the felt circle centered between your stitched names.
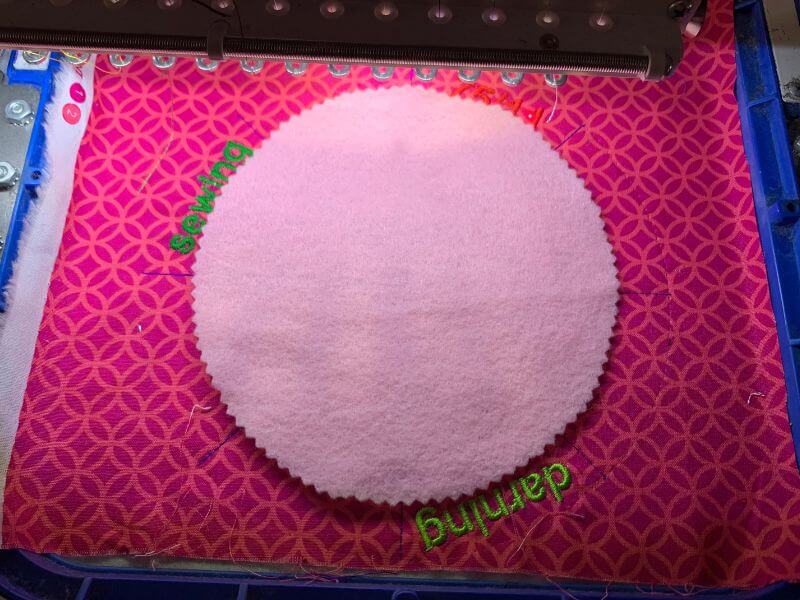
Step 6: Stitch the tack down line.
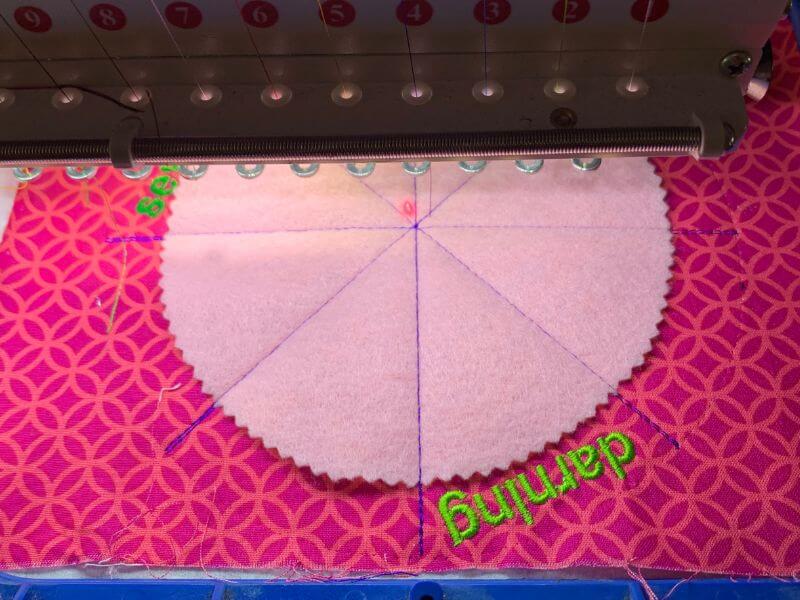
Step 7: Lay down the second cotton square, color 2, over your stitched kit.
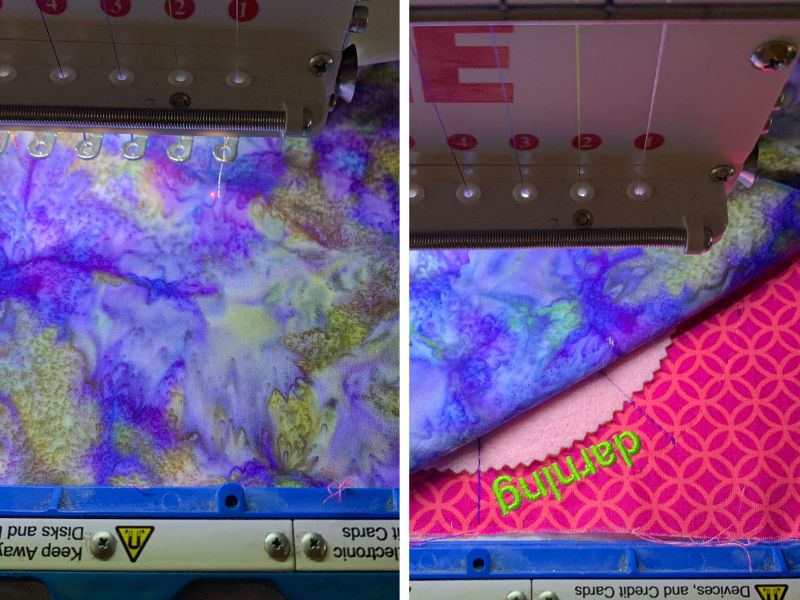
Step 8: Stitch the final tack lines and remove from the hoop.
Step 9: Trim your design to ¼ inch (0.25 inches).
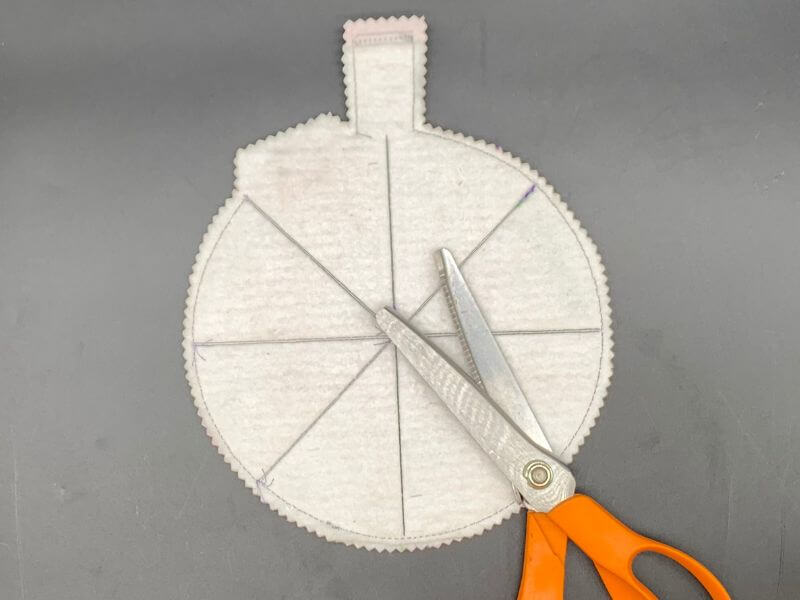
Step 10: Turn inside out and press. Using a needle and thread, close the opening.
Step 11: Crease the kit along the lines as shown below.
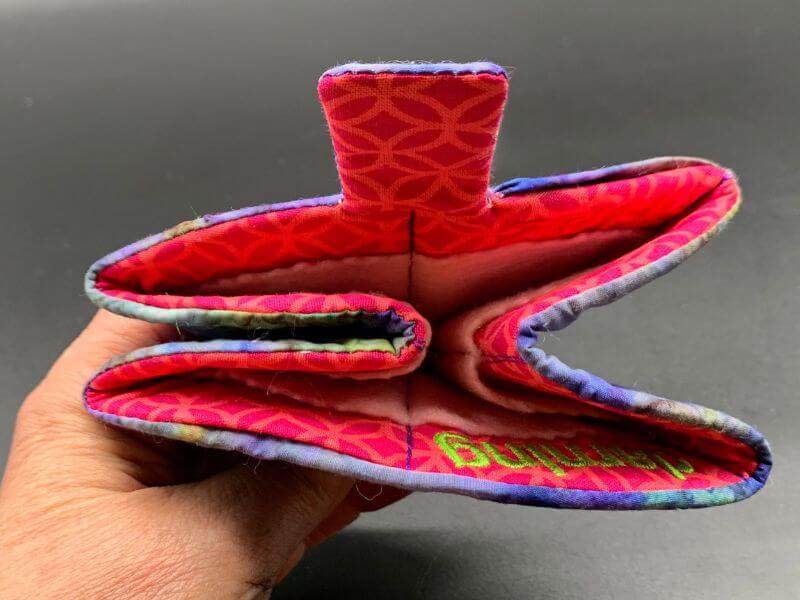
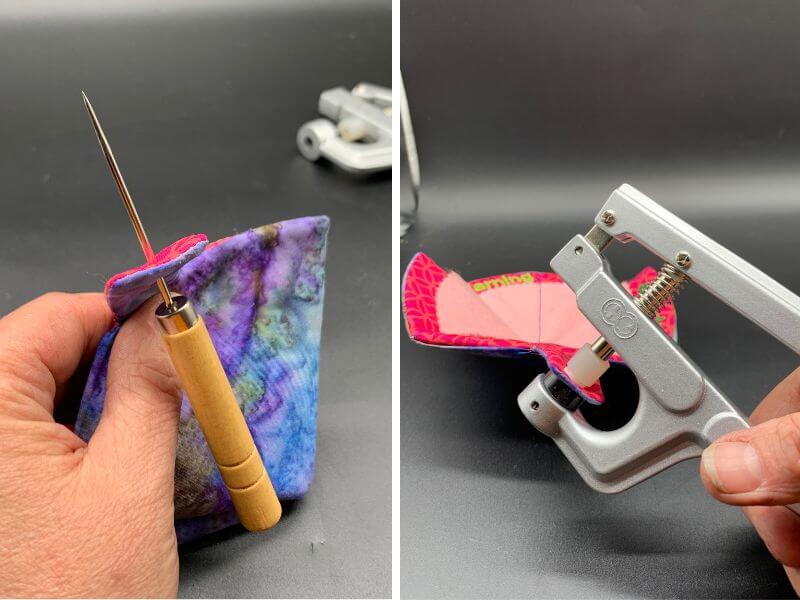
Step 12: Secure two snaps, one on the tab and one on the opposite side.
Step 13: Fold creases, insert needles, scissors, and anything else you need for your sewing kit, and enjoy!
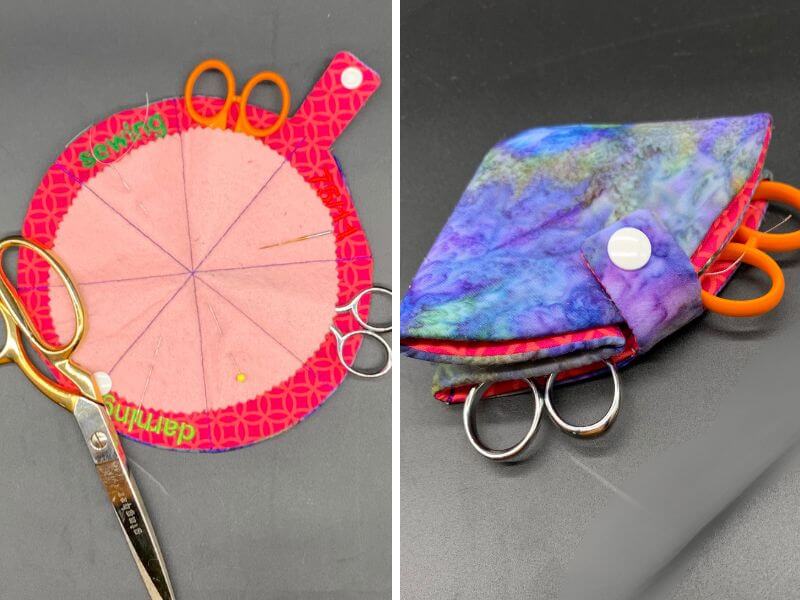
And just like that, you’ve got a handy little sewing kit that folds up beautifully and travels wherever you do! Whether you gift it or keep it for yourself, it’s a sweet way to stay prepared (and stylish!) on the go. Once you make one, don’t be surprised if you start dreaming up matching kits for all your crafty friends!
If you haven’t yet, don’t miss out—try a free demo of the Design Doodler software to see how easy it is to create your own personalized designs!
Until next time, happy doodling!

