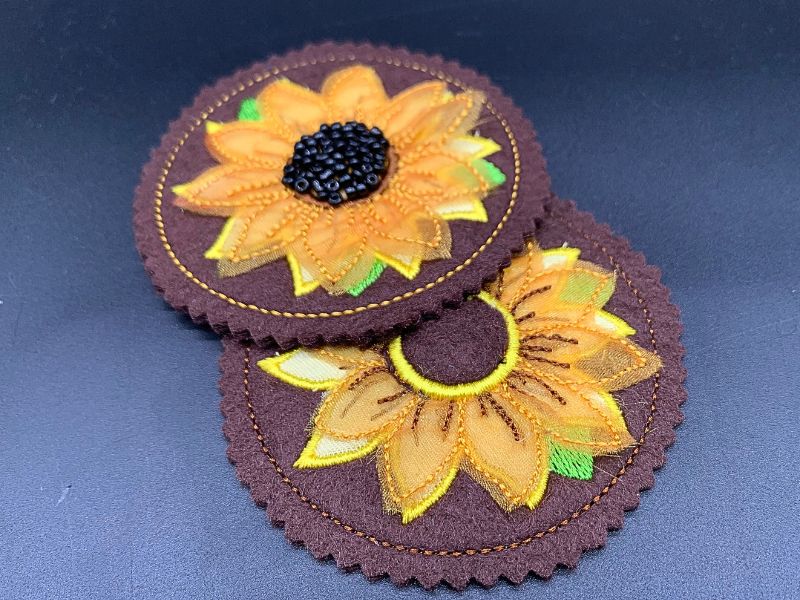
Looking for a quick and cheerful embroidery project that’s perfect for Mother’s Day or simply to brighten up a spring outfit? This sunflower brooch is just the thing!
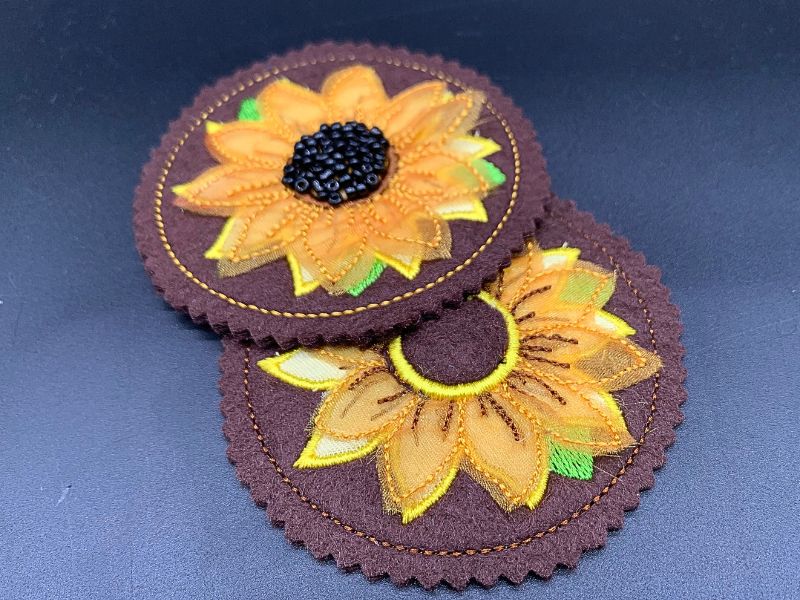
In this blog, we’ll provide step-by-step instructions for creating your own sunflower design. Whether you’re gifting it to someone special or adding a pop of sunshine to your own look, this little project is sure to bring a smile. We include the artwork you’ll need, so all you have to do is follow along and get stitching!
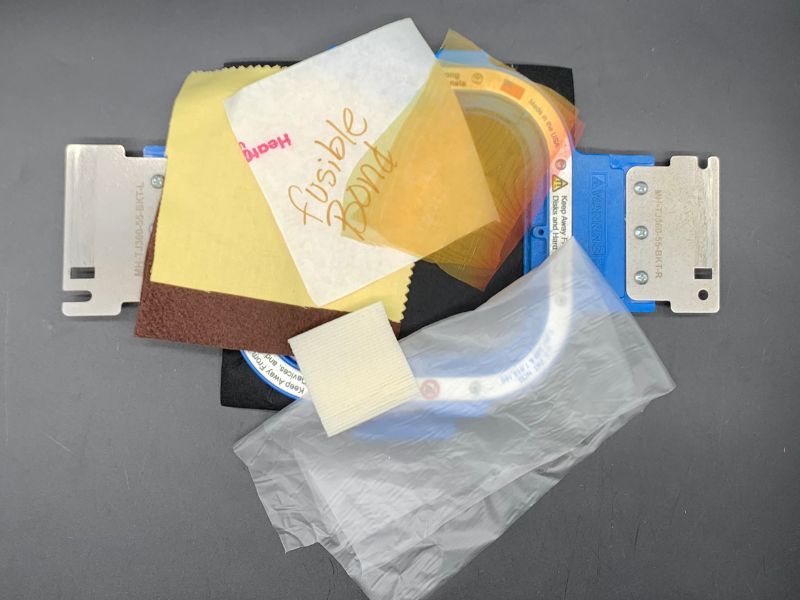
Materials for Sunflower Brooch:
-
Design Doodler software or other digitizing software
- New to the Doodler? Give the free Design Doodler demo a try, and start creating your own embroidery designs! While you won’t be able to stitch them out, it’s a great way to explore all the features and get a feel for what’s possible. Includes 5 video lessons!
- Two pieces of 5” x 5” brown felt
- 5” x 5” piece of yellow cotton
- Two pieces of gold or yellow organza (we recycled organza from an old floral arrangement, but any sheer yellow can work!)
- 1 ½” x 1 ½” piece of “sew foam” (craft foam or other ¼” foam works too!)
- 5” x 5” fusible bonding material
- Dark stabilizer
- Two pieces of water-soluble stabilizer
- Optional: beads and glue for extra embellishment
- Artwork
Digitizing a Sunflower Brooch
Step 1: Insert artwork
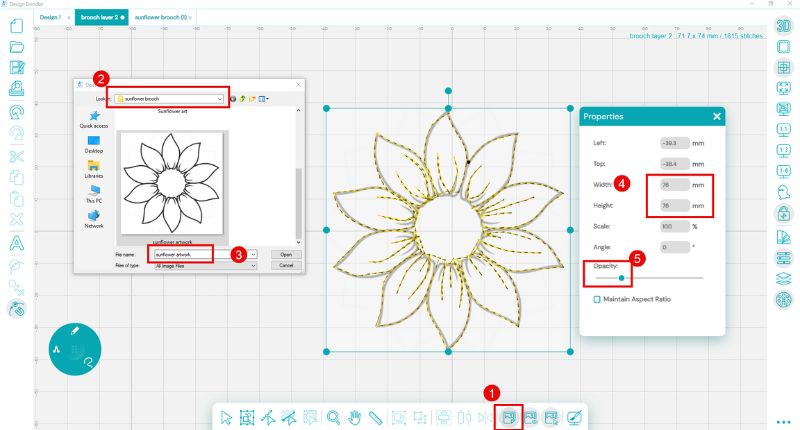
- Click the Insert Backdrop tool
- Navigate to your file location
- Select your artwork
- Resize to 76 mm (3 inches)
- Reduce the opacity so you can see your doodling
Step 2: Working on the Organza Layer
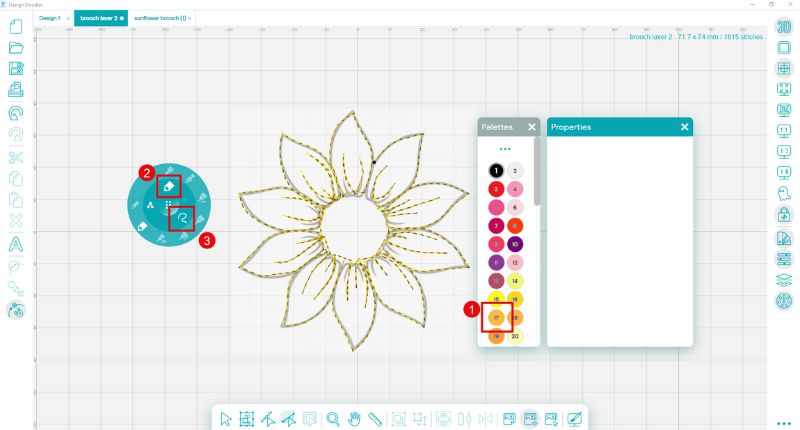
- Select your color
- Choose the Run Bean brush
- Select the free draw option
Step 3: Save your file.
Step 4: Next, we’ll doodle the base layer. Start by inserting your artwork as in the previous steps.
Step 5: Doodle the leaves.
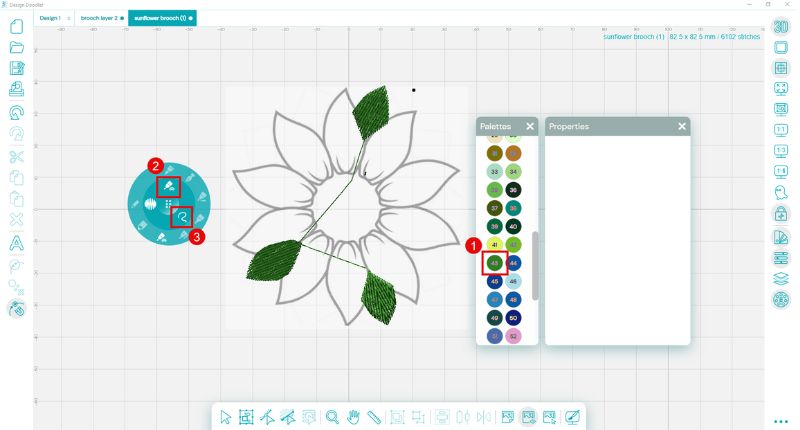
- Choose your color
- Select the Fill Brush
- Choose the free draw option
Step 6: Doodle the brown veins
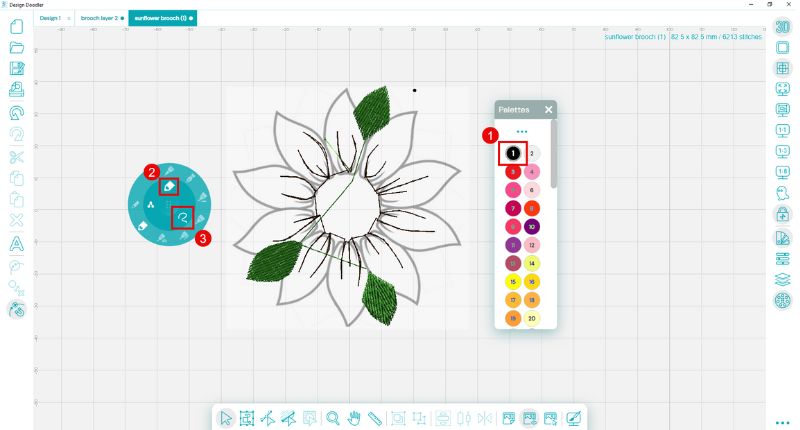
- Select your color
- Choose the Run Bean brush
- Select the free draw option
Step 7: Now, we’ll use the appliqué tool! This tool creates three layers, and you can choose the colors you like.
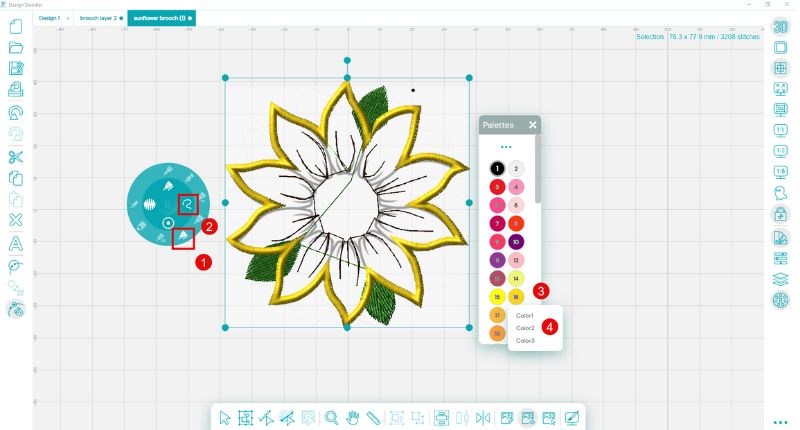
- Choose the appliqué tool
- Choose the free draw option
- Select a color. A box will pop up asking which layer will be assigned this color (you can do this for each layer by selecting the object and attempting to choose a color)
- Choose which layer the selected color is for
Step 8: Doodle the center circle
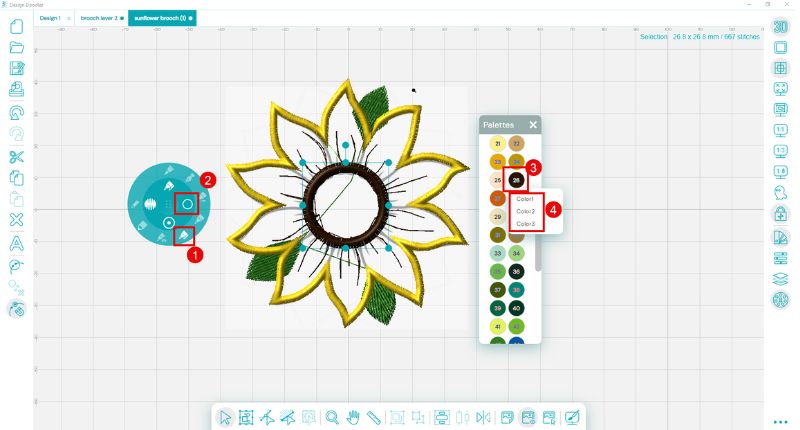
- Choose the appliqué tool
- Choose the circle option
- Choose a color
- Select which layer the color is for
Step 9: Create your final stitching line
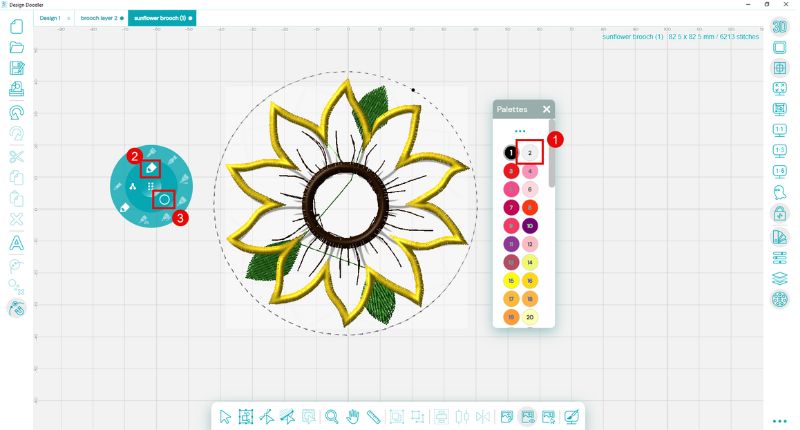
- Select your color
- Choose the Run Bean brush
- Choose the Circle tool
Now that we have the files ready, let’s get stitching!
Start with the organza layer; you will use water-soluble stabilizer as you would with free-standing lace. We used two layers of topper, but you may use any type. The organza we used was recycled from a flower bouquet. We used two layers turned at an angle.
Embroidering a Sunflower Brooch
Step 1: Stitch the organza layer
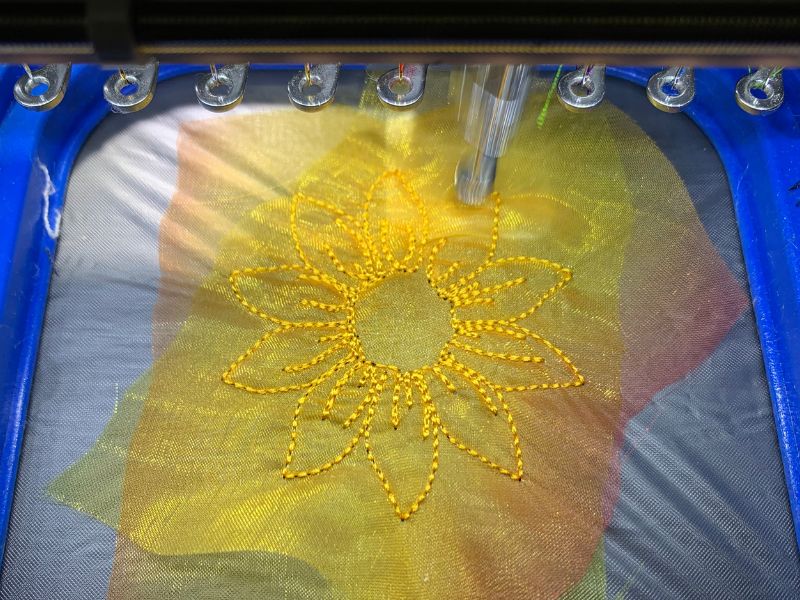
- Hoop a doubled piece of topper or one piece of soluble stabilizer.
- Lay down your doubled organza pieces.
- Stitch the design to the end.
Step 2: Remove from the hoop and trim after washing away the stabilizer (don’t worry about any fraying threads). Set this aside.
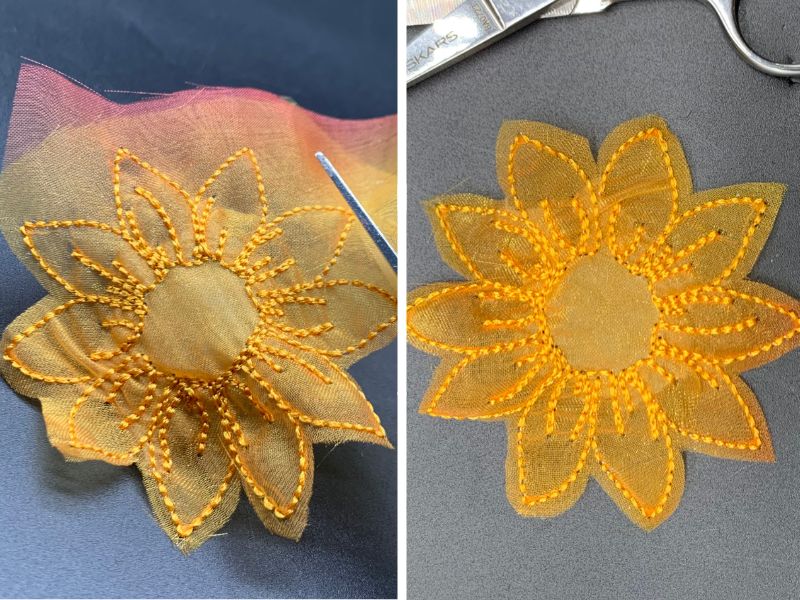
Step 3: With your second file, stitch the base layer.
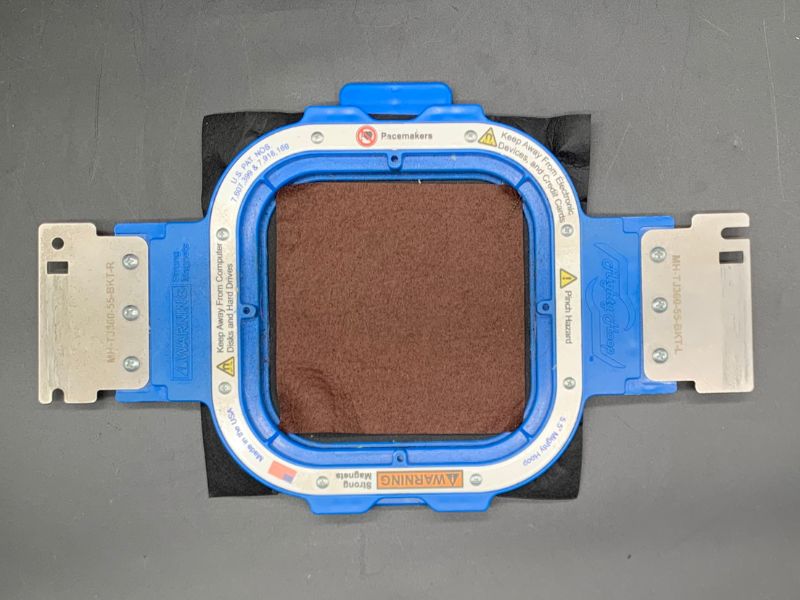
- Hoop your stabilizer (we chose to use black).
- Place one piece of the brown felt in the hoop using a light spray of temporary adhesive.
Step 4: Stitch the green leaf layer.
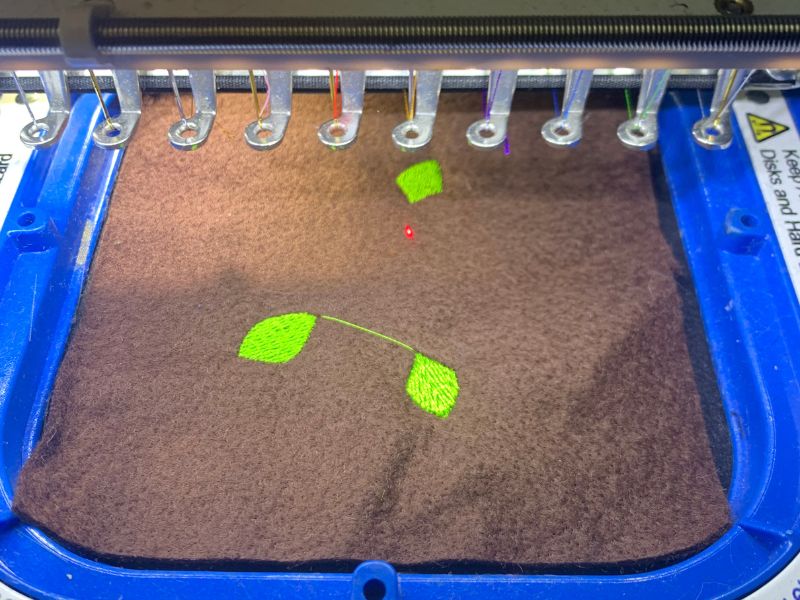
Step 5: After stitching the green leaves, lay down the yellow fabric.
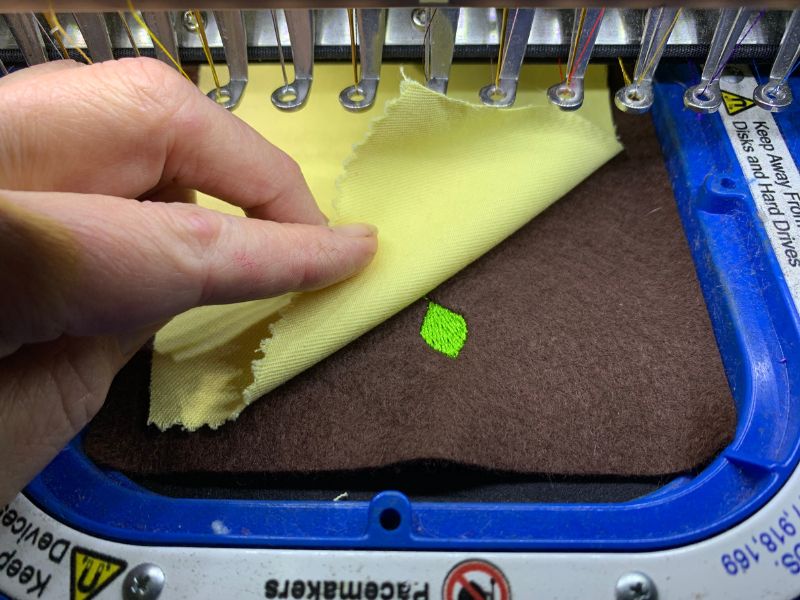
Step 6: Stitch the brown veins on the yellow layer.
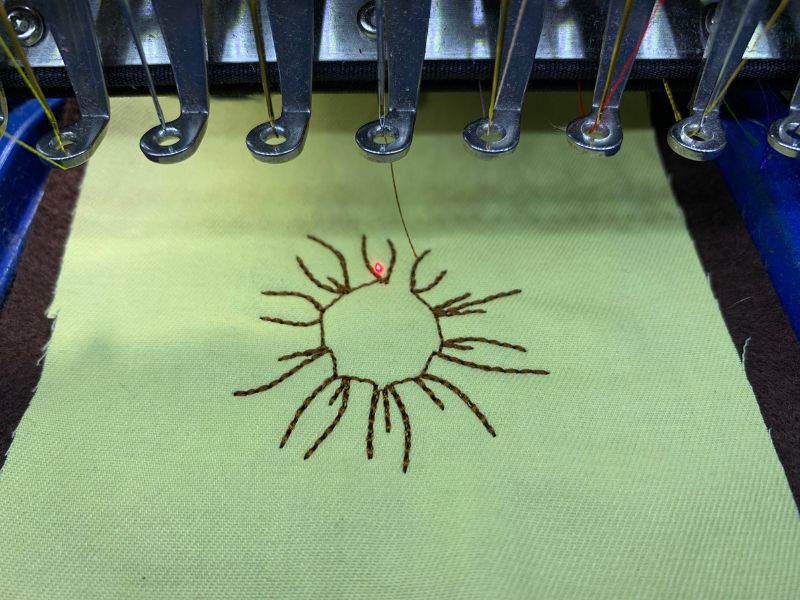
Step 7: Stitch up through the second tack down line on the yellow material (since we did not need both placement lines, we let them stitch on top of each other for a more secure edge).
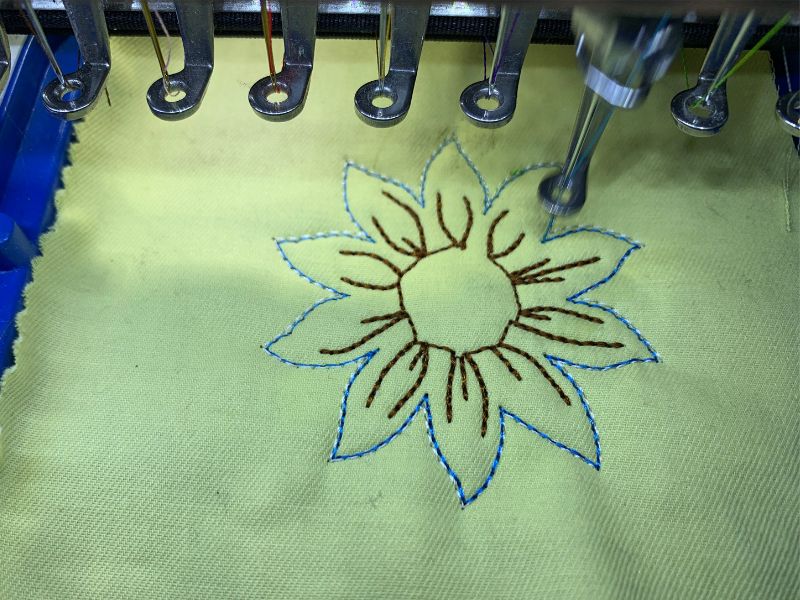
Step 8: Trim the appliqué and return to the machine.
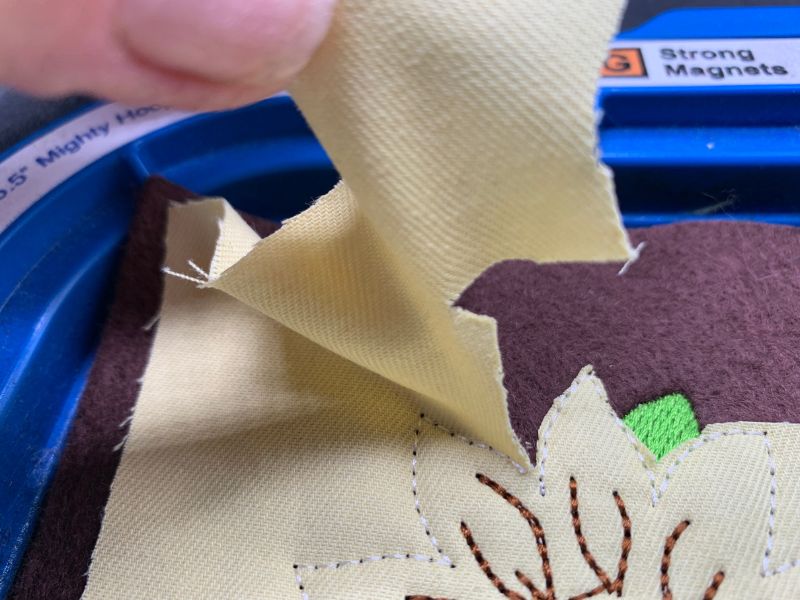
Step 9: Stitch the satin border.
Step 10: Using the center circle as a guideline, line up the organza piece and secure with a temporary spray.
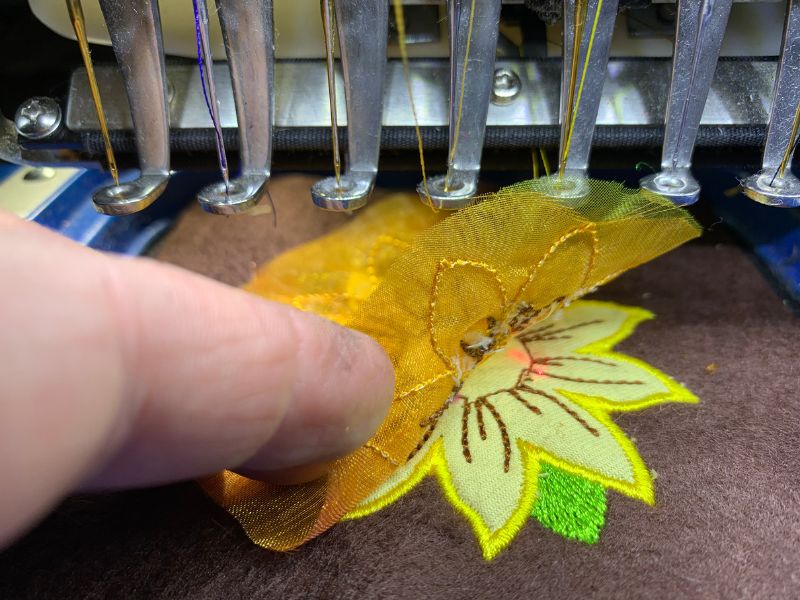
Step 11: Place your foam square using temporary spray.
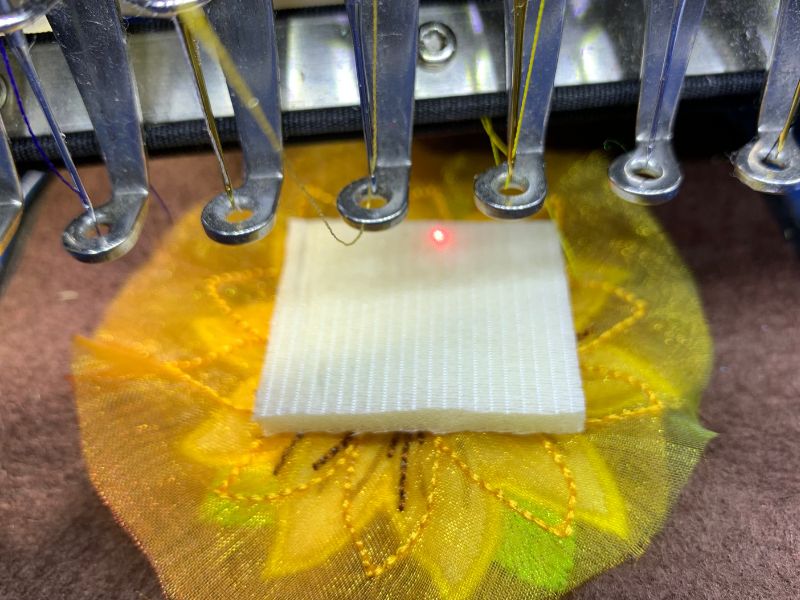
Step 12: Stitch the placement circle on the foam.
Step 13: Remove the hoop from the machine, and trim carefully.
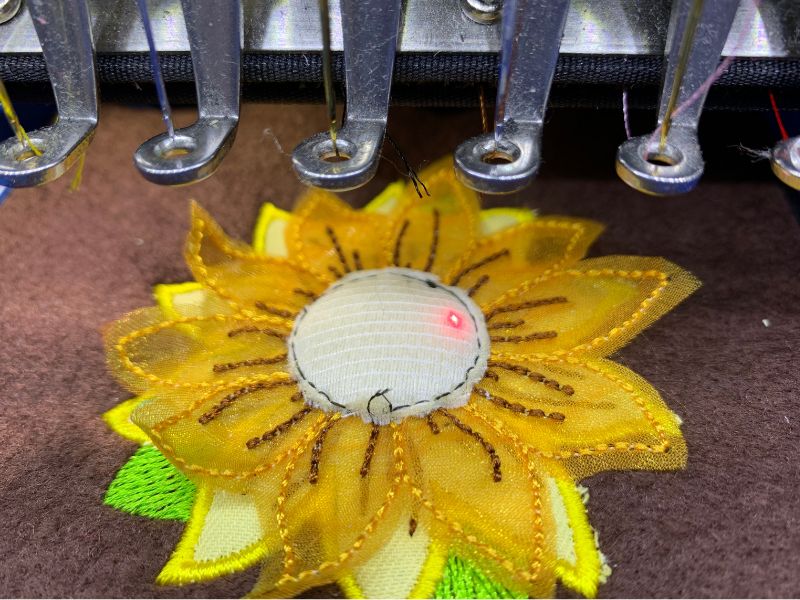
Step 14: Return to the machine and lay down the felt square.
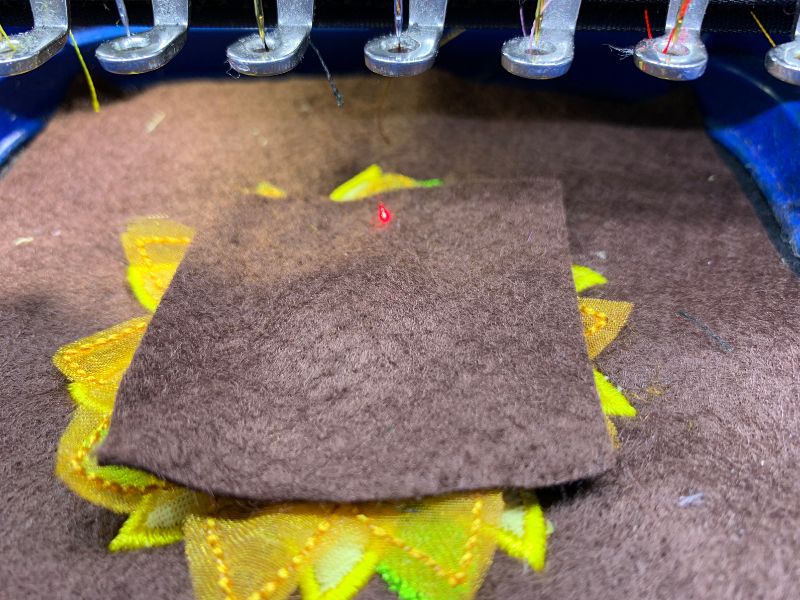
Step 15: Stitch the tack down line and trim carefully.
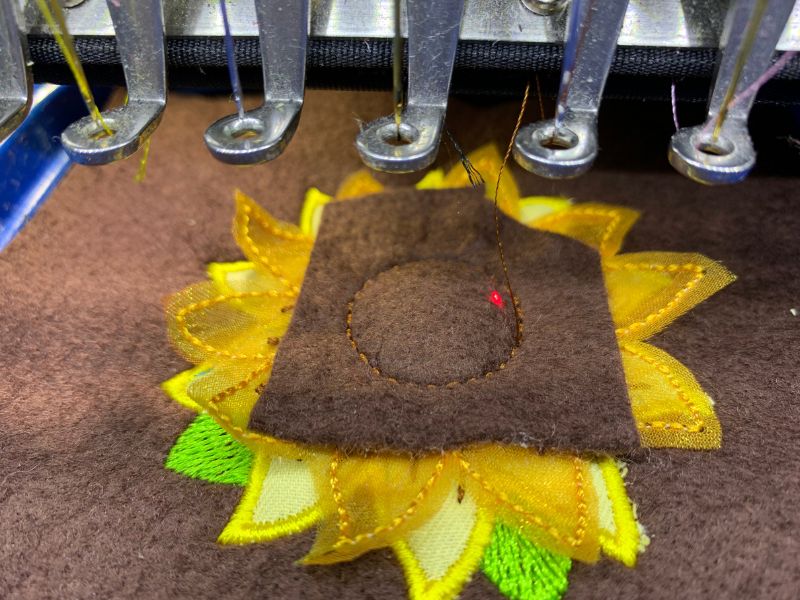
Step 16: Return to the machine and stitch the satin cover line.
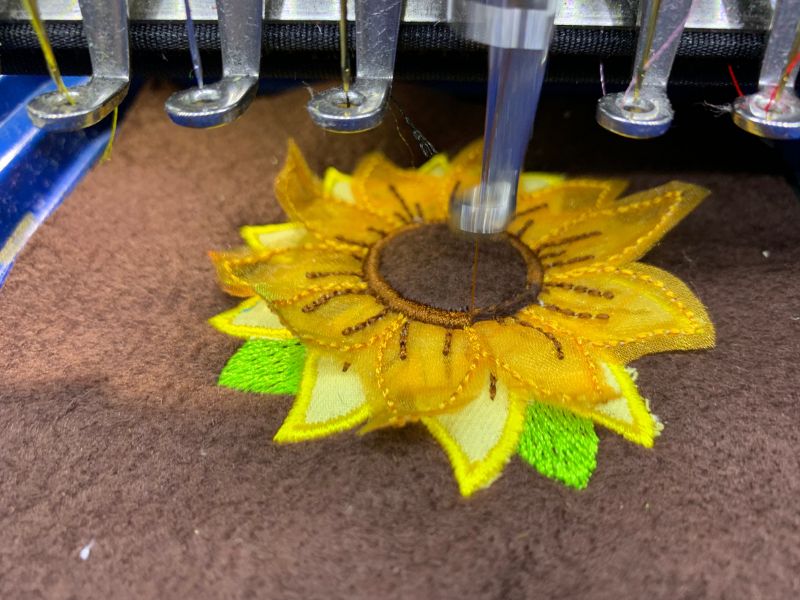
Step 17: Stitch the final circle.
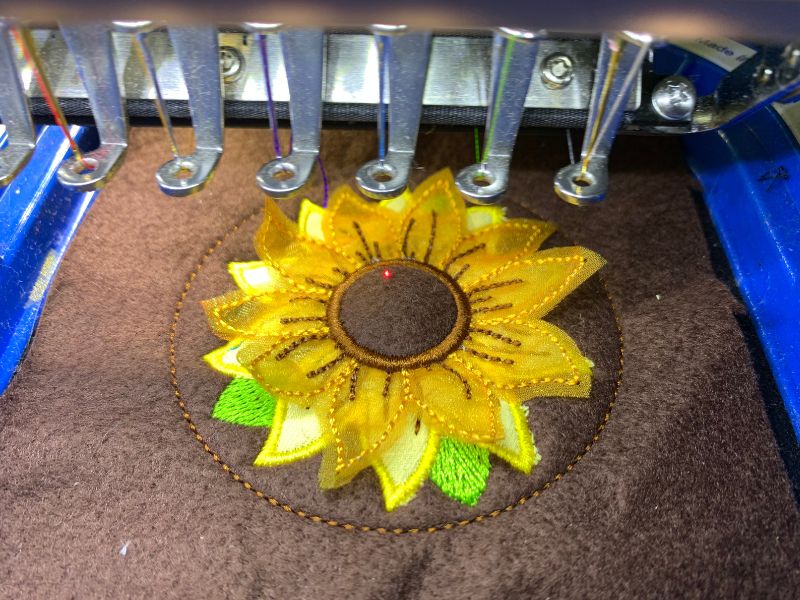
Step 18: Remove from the machine and trim the stabilizer close to (but not cutting) the final stitch line.
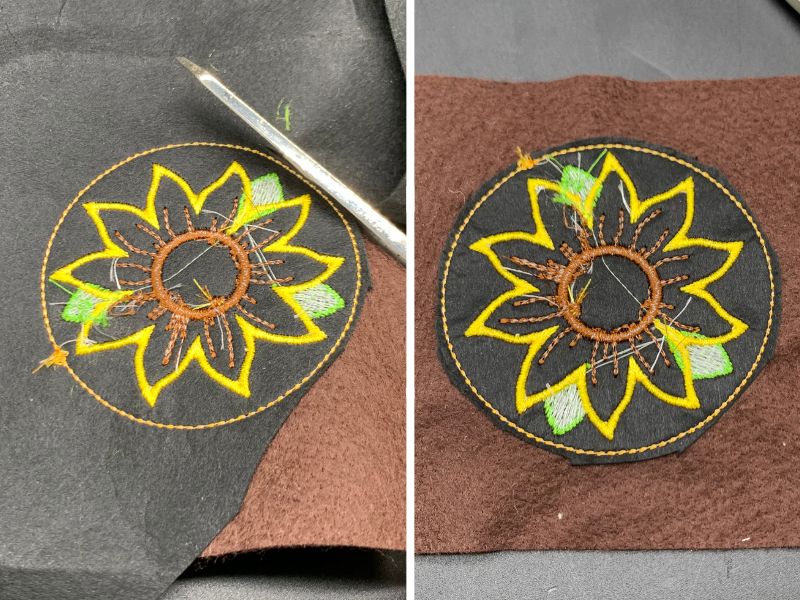
Step 19: Fuse the second 5” x 5” square of felt to the back of your sunflower and trim with pinking or regular shears.
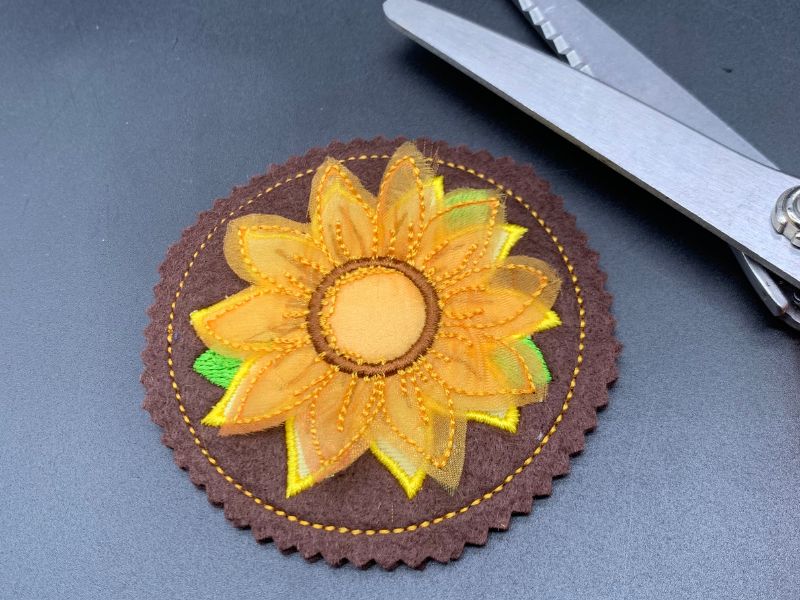
Step 20: Hot glue a pin back on your sunflower.
Optional: If you want to add beads, here’s how you do it!
Pour some craft glue on a square of paper.
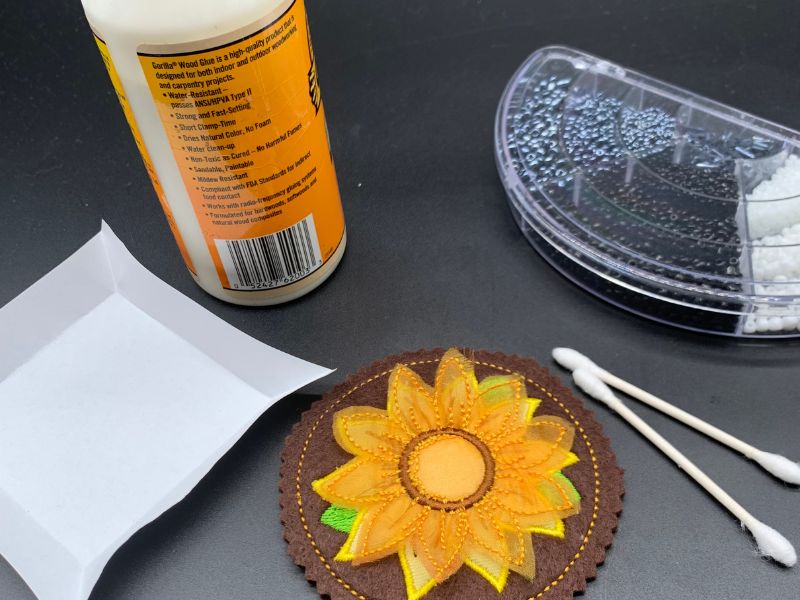
Using a cotton swab, carefully cover the raised area of the flower center.
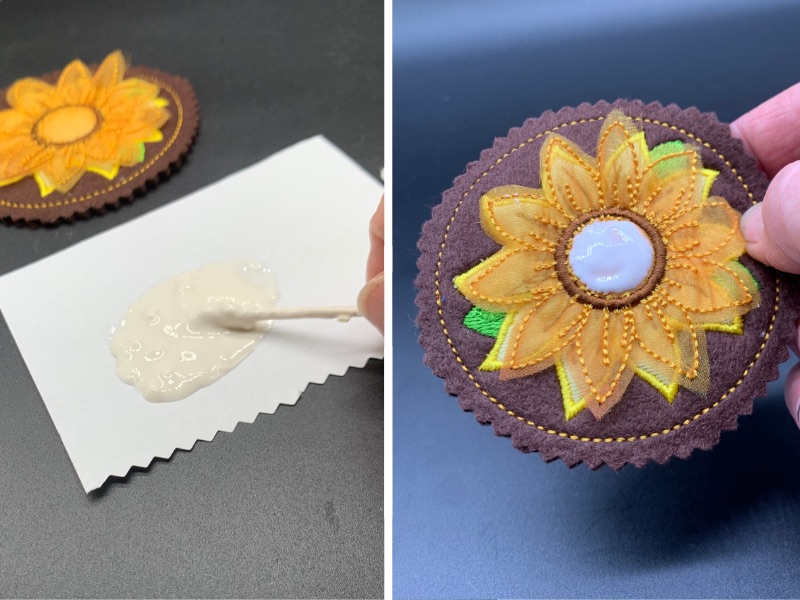
Either place beads individually or turn the glue-covered piece over into a bowl of black or brown beads.
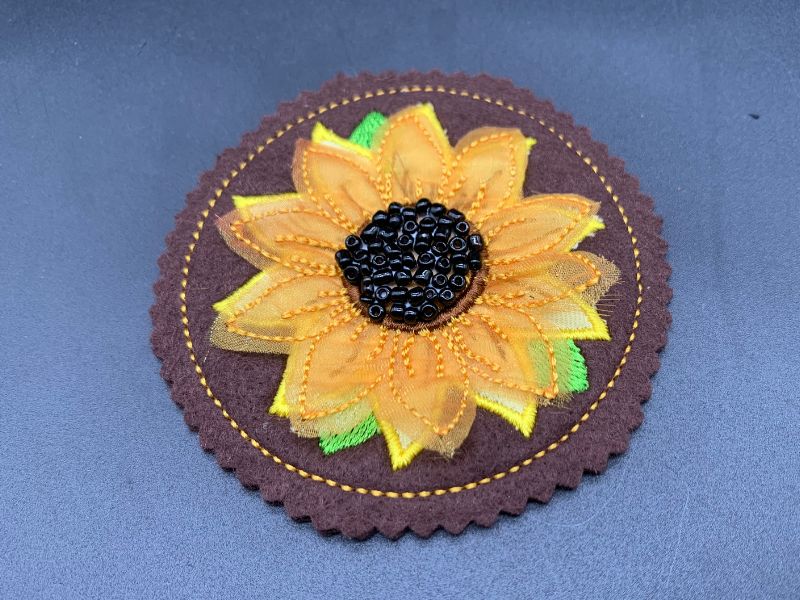
And just like that, you’ve got the perfect little gift or springtime accessory! Once you get the hang of it, you’ll dream up all kinds of flowers to stitch. The appliqué tool makes it so simple—just let the Doodler do the hard work while you enjoy the creative fun!
If you haven’t yet, don’t miss out—try a free demo of the Design Doodler software to see how easy it is to create your own personalized designs!
Until next time, happy doodling!
