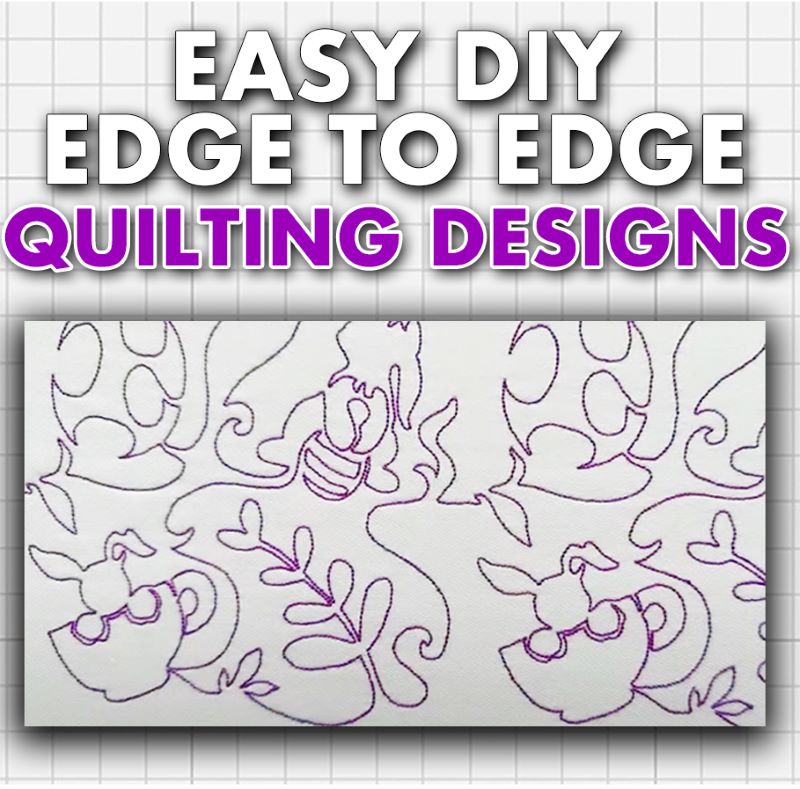
Finding the perfect edge-to-edge design for your next quilting or embroidery project can be challenging, so why not create your own?
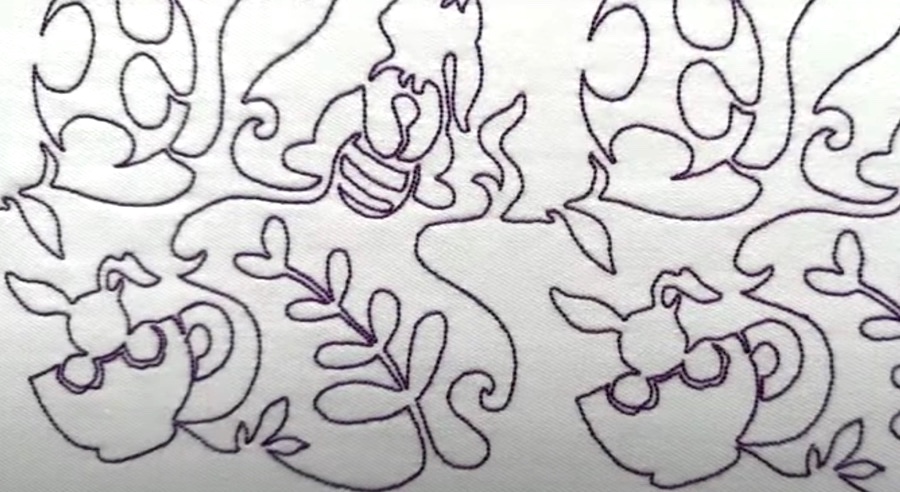
Our easy-to-follow tutorial will help you create intricate and stunning edge-to-edge designs. Whether you’re a seasoned quilter or just starting, we’ve got tips and techniques to help you turn your quilts into the works of art you’ve dreamed of!
Tips When Creating Edge To Edge Designs
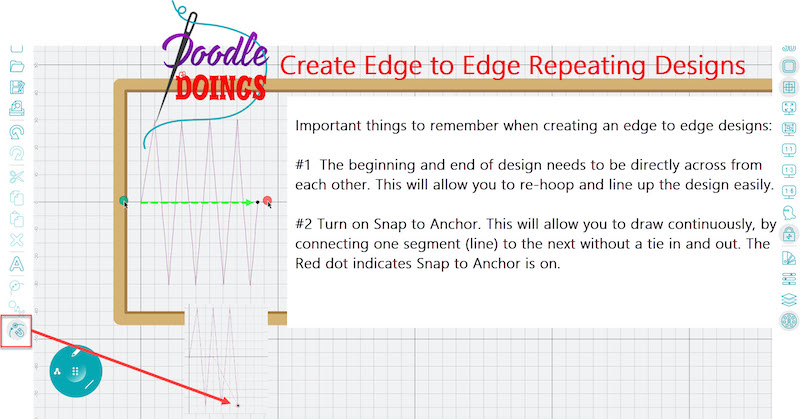
- The beginning and end of your design need to be directly across from each other to allow you to re-hoop and line up the design easily.
- Turn on “Snap to Anchor” to draw continuously by connecting one segment (line) to the next without a tie-in and out. The red dot indicates that “Snap to Anchor” is on.
Edge To Edge Quilting Design Tutorial
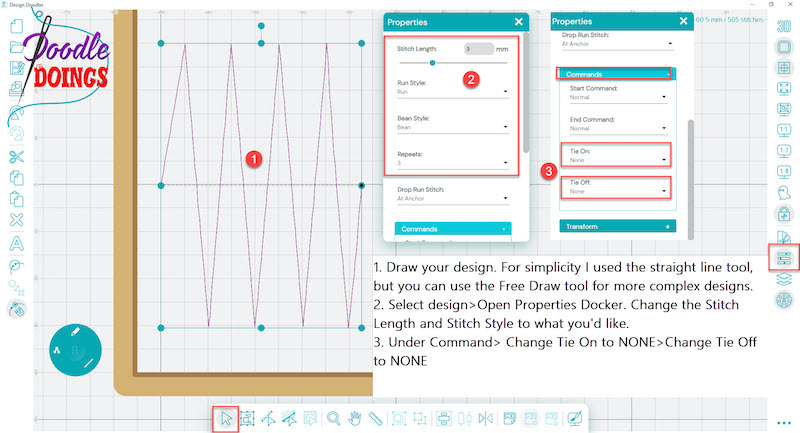
Step 1: Draw your design. I used the straight line tool for simplicity, but you can use the Free Draw Tool for more complex designs.
Step 2: Select design > open Properties Docker. Change the Stitch Length and Stitch Style to what you’d like.
Step 3: Under Command > change Tie On to NONE > change Tie Off to NONE.
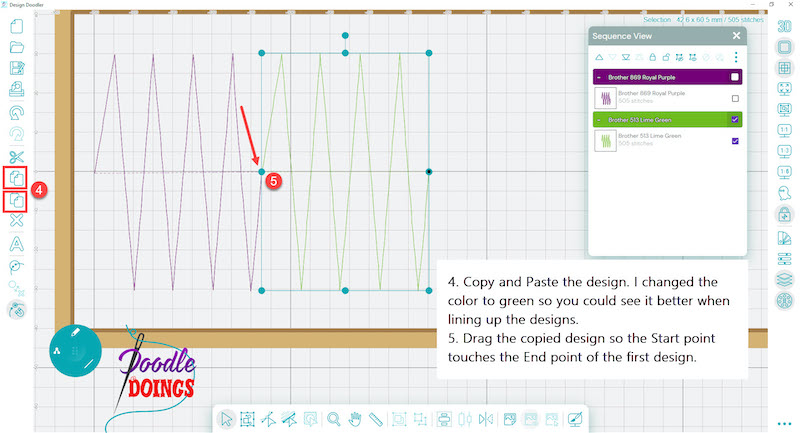
Step 4: Copy and Paste the design. I changed the color to green so you could see it better when lining up the designs.
Step 5: Drag the copied design so the Start point touches the End point of the first design.
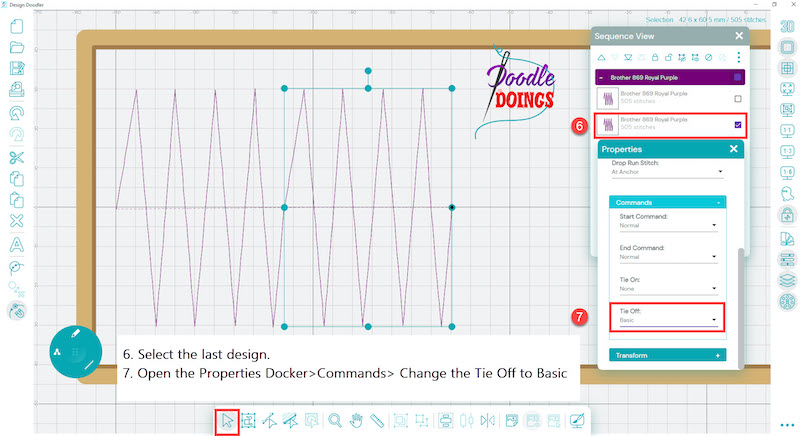
Step 6: Select the last design.
Step 7: Open the Properties Docker > Commands > Change the Tie Off to Basic
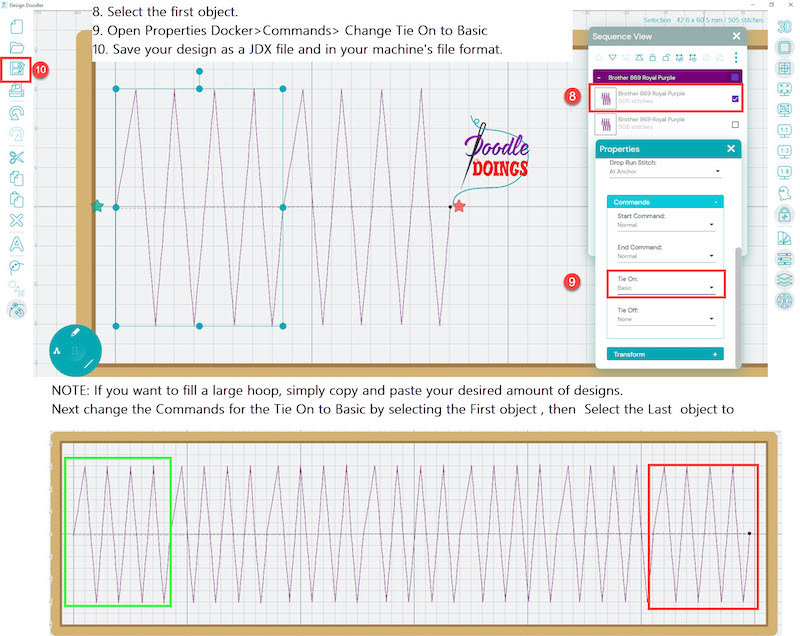
Step 8: Select the first object.
Step 9: Open Properties Docker > Commands > Change Tie On to Basic.
Step 10: Save your design as a JDX file and then in your machine’s file format.
We can’t wait to see what you come up with for your next edge-to-edge design!
