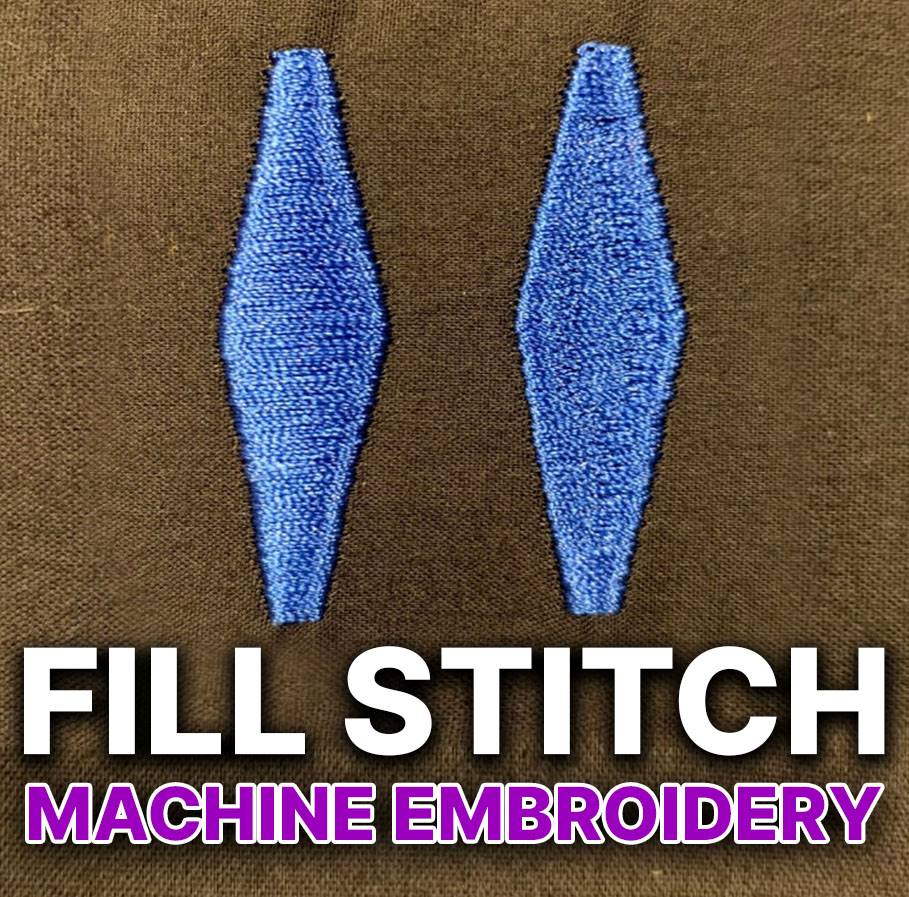
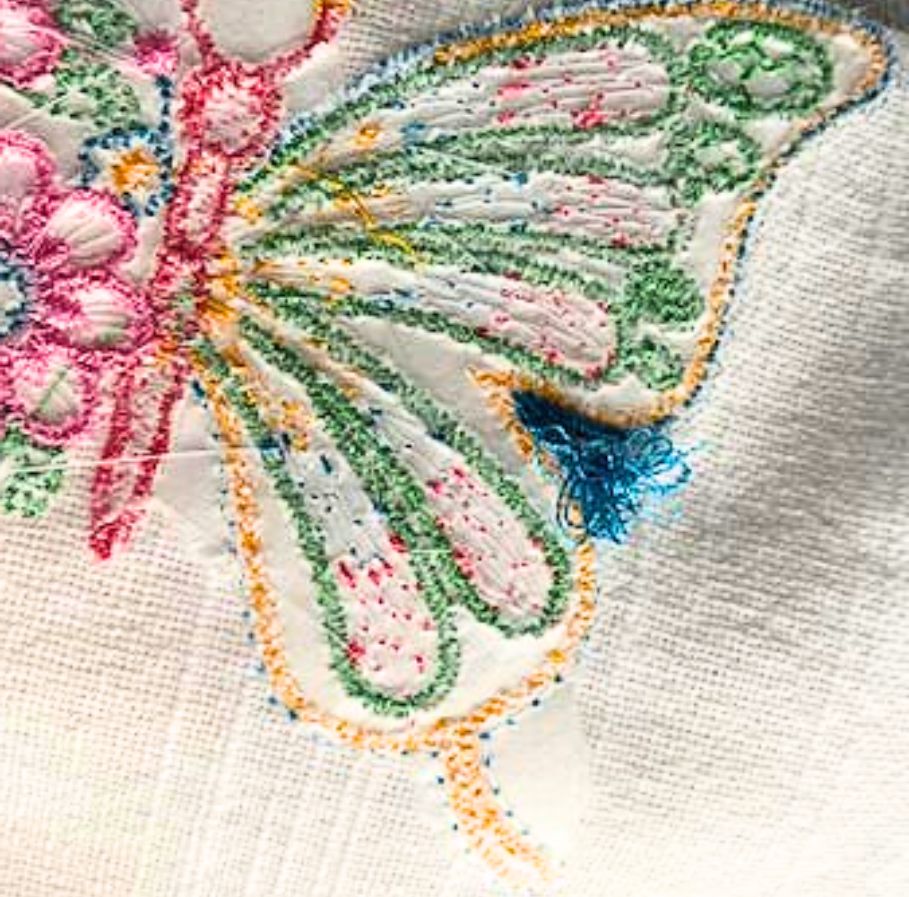
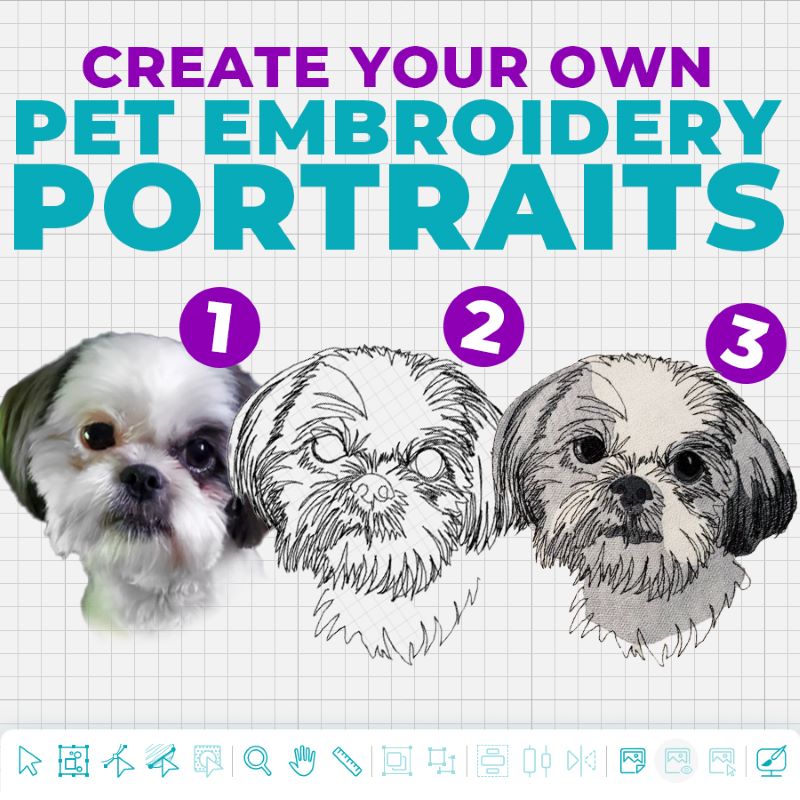
Have you ever wondered how rich, textured backgrounds in machine embroidery are made? Fill stitches are the key! They turn simple outlines into stunning, intricate designs. With so many types available, which one should you choose?
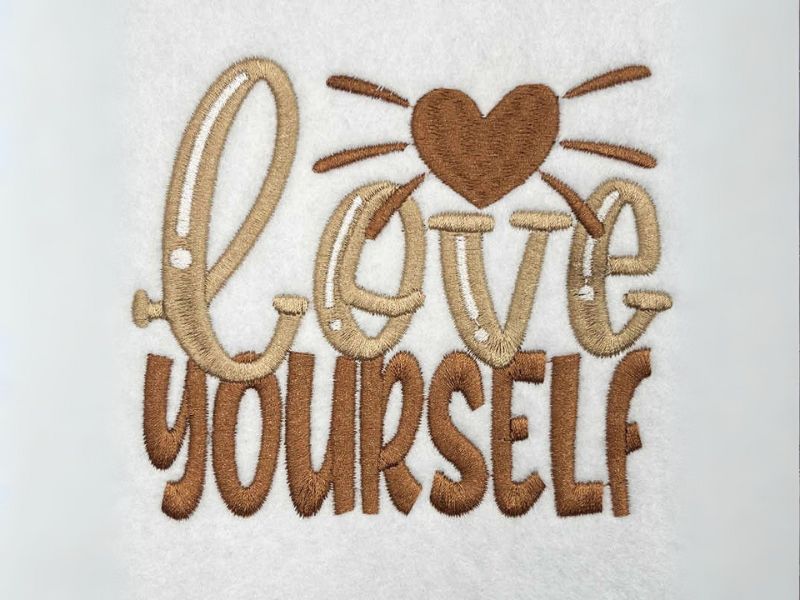
This article explains four important fill machine embroidery stitches: satin, tatami, embossed, and motif fill. These stitches can make your embroidery look amazing. Whether you are a pro or just starting, this guide will help you pick and use the best fills for any project.
Ready to level up your stitching? Let’s dive in!
Satin Stitch in Embroidery
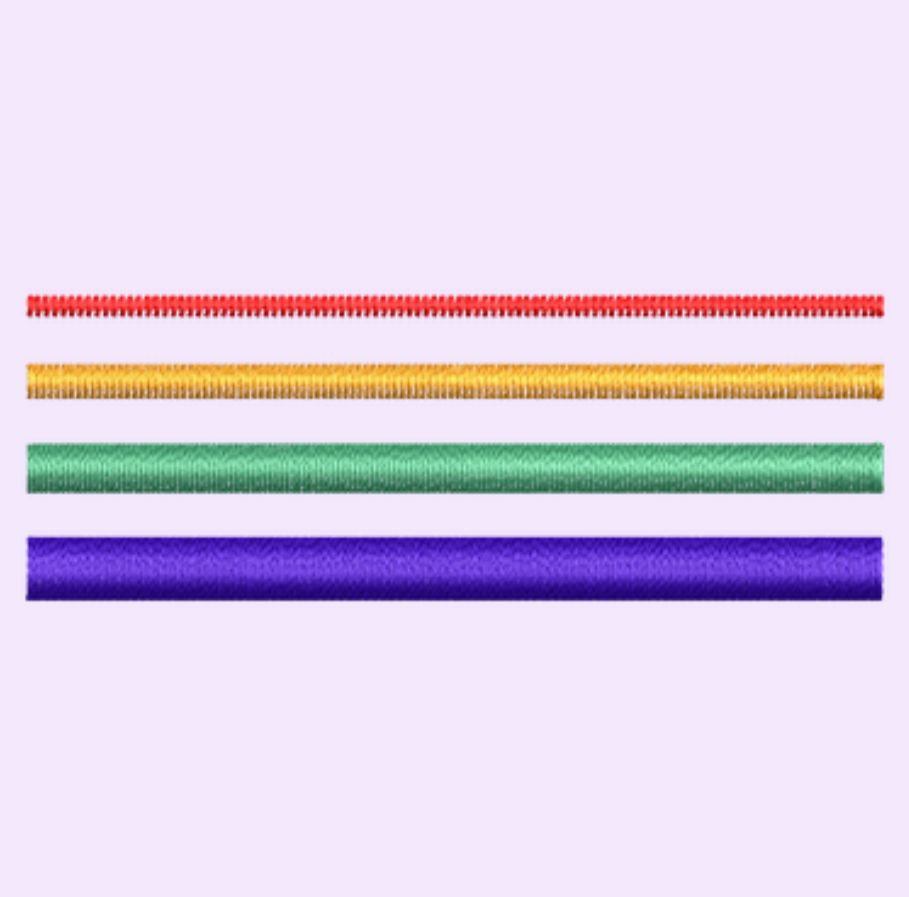
Satin stitches are commonly used for outlines, lettering, lines, and small shapes. Did you know you can also use them to fill areas? Remember that what you see on screen might look harsher than when it’s stitched. Don’t let that throw you off!
Here are some examples of the satin stitch used to fill.
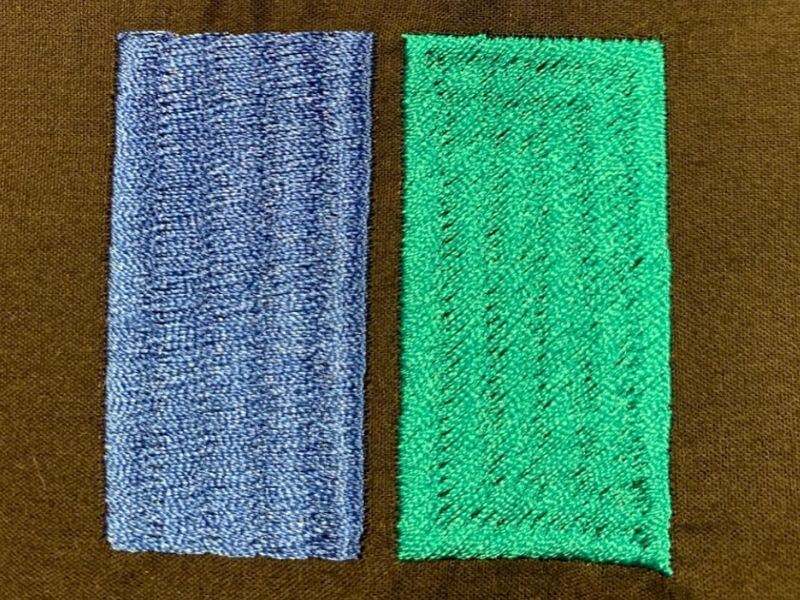
The satin stitch can be a very gentle fill.
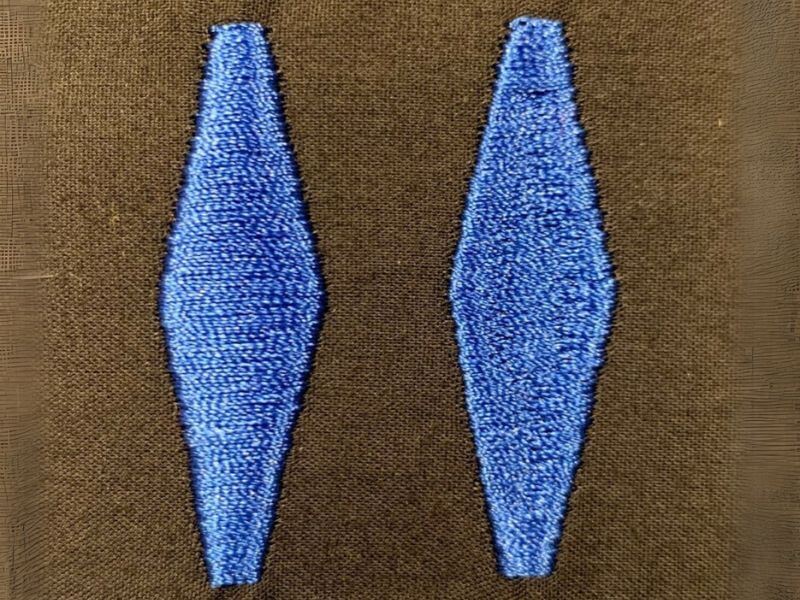
Another satin option is the “auto split” function. This feature tells the machine to stop in the object’s center to shorten the satin stitch length. Auto split keeps the satin fill intact, but it has a maximum stitch length of 7 mm, which is the maximum recommended for clothing. Any longer, you run the risk of snags or breaks with wear.
Below is an example of the satin stitch with the auto split turned on (left) and off (right).
Looking for easy-to-use digitizing software that delivers amazing results? Check out our our game-changing new Embroidery Legacy Digitizer Software
As you can see, this object is larger than 7 mm, so the digitizing software adjusts the stitches and blends them nicely. While the change is subtle in the image above, the final result looks fantastic!
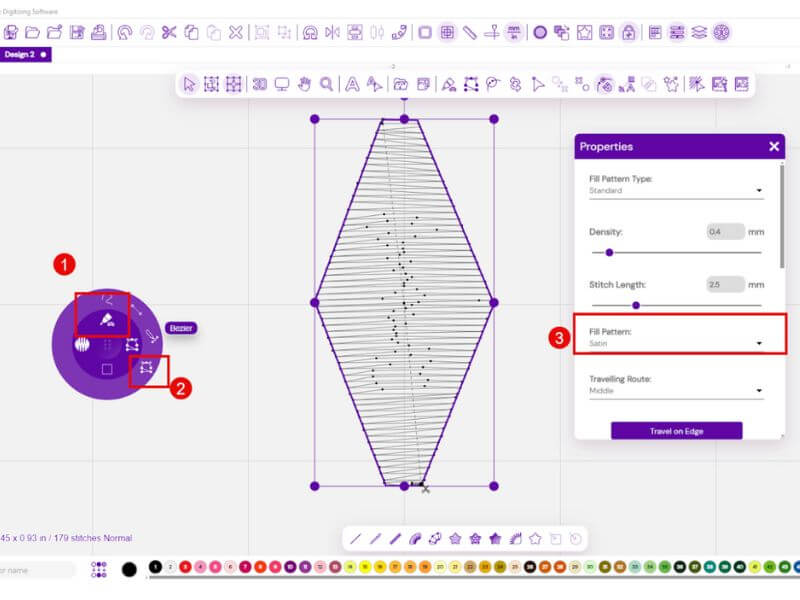
Aside from issues like snagging or puckering with long satin stitches, there’s another common problem. Have you ever used a satin fill? Did you notice the machine stitching on one side, tying it off, and then stitching the other side?
This happens repeatedly because most machines have a stitch length limit of 10 mm (some go up to 12 mm). When the stitch exceeds that limit, the machine says “nope” and ties off.
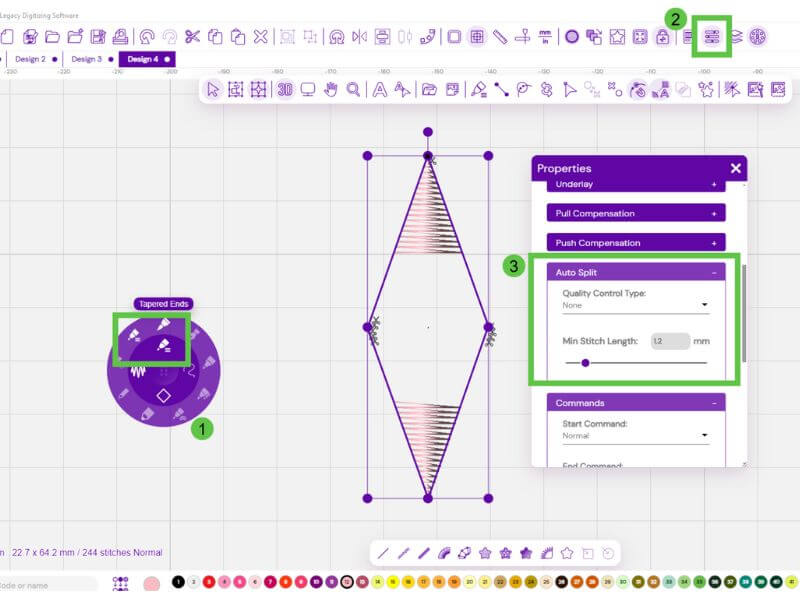
- Select Satin Fill, draw your object, and select
- Open the properties tool
- Under the auto split tab, you can choose to turn on or off the “split”
If an object is too large for the chosen stitch length, it won’t stitch properly, leaving a gap. To resolve this, simply turn on the “auto split” option.
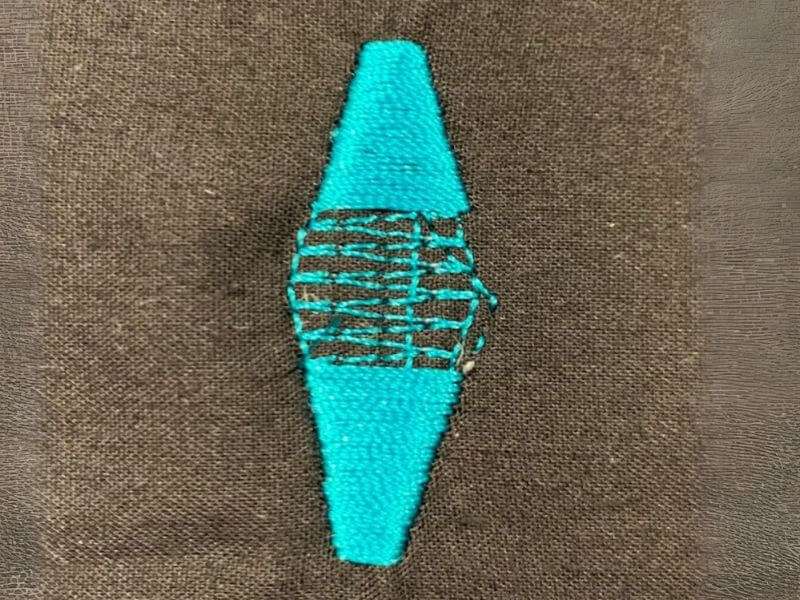
Overall, the satin stitch can be a great choice when used correctly.
Let’s look at some other fill types!
Tatami Stitch in Embroidery
Tatami stitch looks like a brick pattern inspired by tatami mats in Japan.
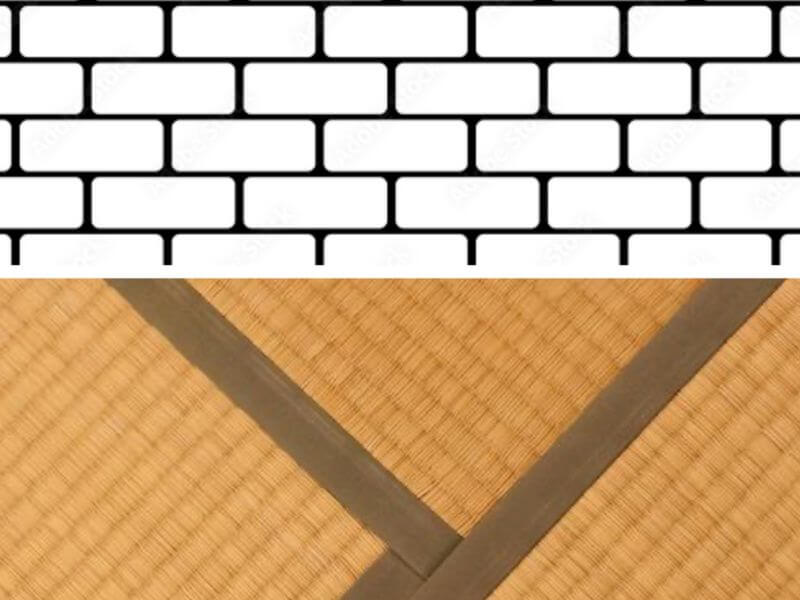
The design features a gentle texture with a more matte finish. You can use it in many ways, from an underlay to a fill, and it remains super stable.
Tatami is perfect for large areas, but it does have limitations.
The tatami stitch does not like small holes cut into it! Holes actually create more stitches, so if you’re trying to save stitches, remove that hole. When designing, it is best to embroider on top of the tatami rather than cut a little hole for another object.
Here is an example of an object with holes cut out to add highlights.
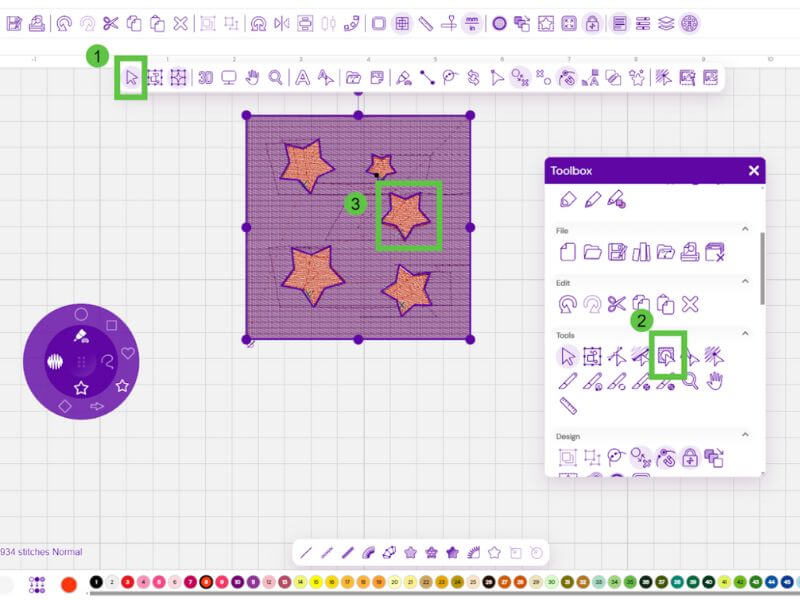
- Select the object in which you want holes
- In your Toolbox, select “Create Holes.”
- Draw the shape of the hole you would like to create
- Press enter
The holes in the object create many extra stitches. This happens because the tatami stitch needs stitches to stop and turn at each edge.
Since tatami has so many stitches you can have issues of pulling. Pull happens when the stitches cause the fabric to contract and can result in shifting (when the lines don’t meet up).
Want to learn more about push & pull compensation? Take a look at this video:
Don’t be misled into thinking that making the stitches longer will make the pull less… it is actually the opposite! Shorter stitches will create less pull.
Tatami is terrific for larger areas or as a fill below other stitches. It can be altered in the following ways:
- Use it as a background to your design
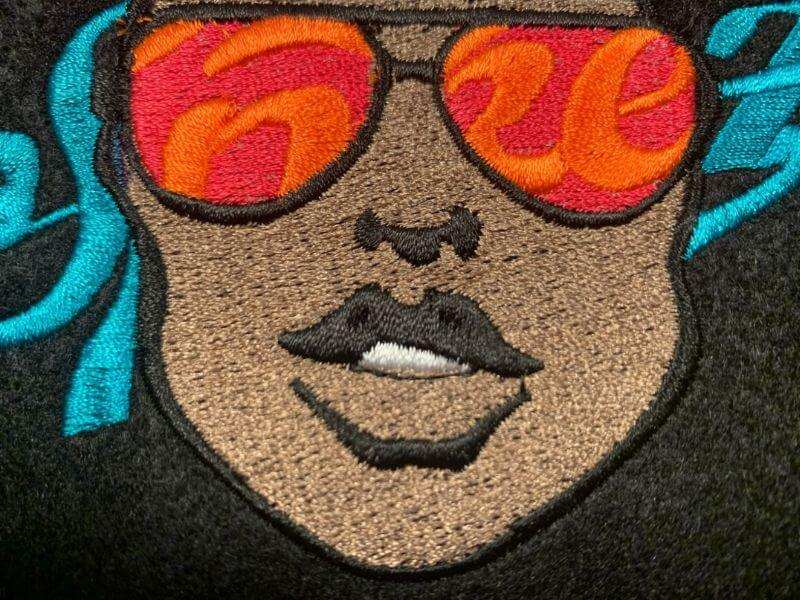
- Change the fill density to an exceptionally loose fill and use it for a special mylar effect!
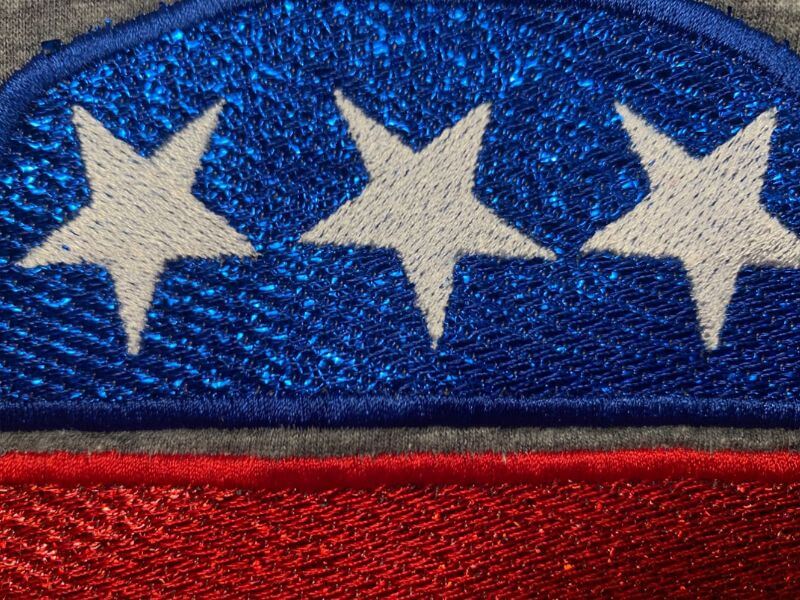
- Use a loose fill to create blending!
Using the Embroidery Legacy Digitizer Software, you can create color gradients by blending. You can combine color and density to create the ombre effect.
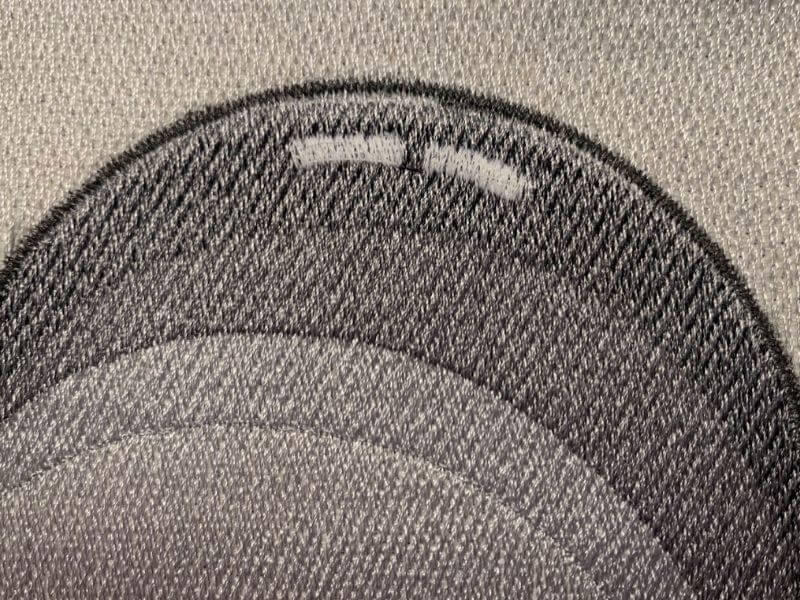
Color blending happens by making an object filled with tatami. Then, you duplicate this object. Next, change the duplicate to a new color.
Finally, apply gradient fills to blend the colors. Adjust one fill to face upward and the other downward for a smooth color transition.
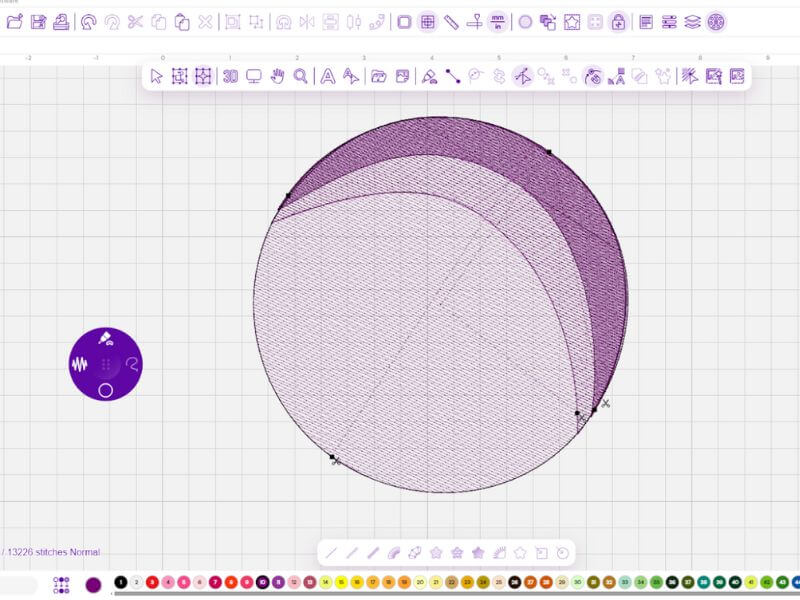
We started with a loosely filled circle.
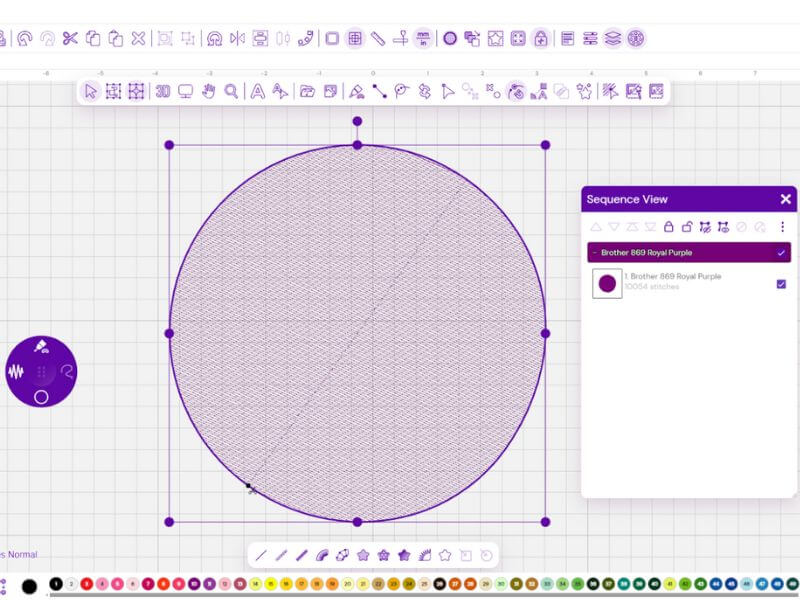
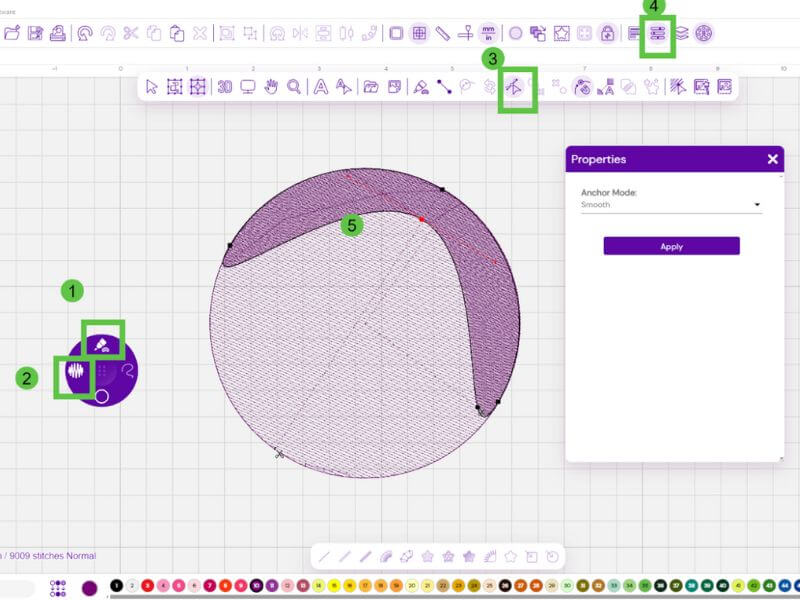
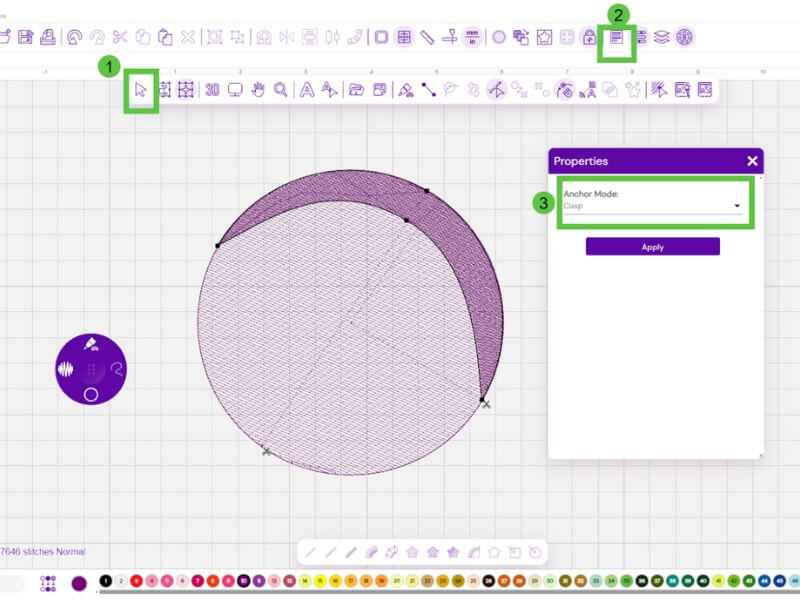
Next, we’ll create crescents by working from dark (dense) to light (loose), using the same circle size while adjusting the fill density. We’ll also modify the node shapes to form the crescent shape effortlessly.
Embossed Fills in Embroidery
Like patterns can be woven into rugs or fabric, tatami stitching can create amazing embroidery designs. Adjusting the length of the stitches forms gaps where the stitches meet, revealing the design within the texture.
EL Digitizer offers a wide range of creative options! With the software, you can create unique variations of the tatami stitch that give an embossed effect. Here’s how to achieve this look:
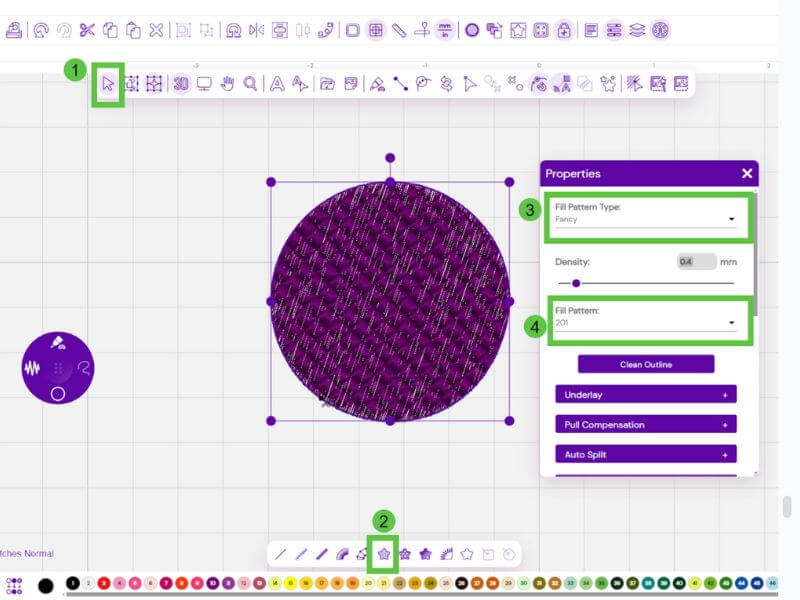
- Select your object
- Choose the Convert To FIll tool
- After opening the Properties tool select the Fancy Option
- Select your desired fill
Here is what an embossed fill looks like
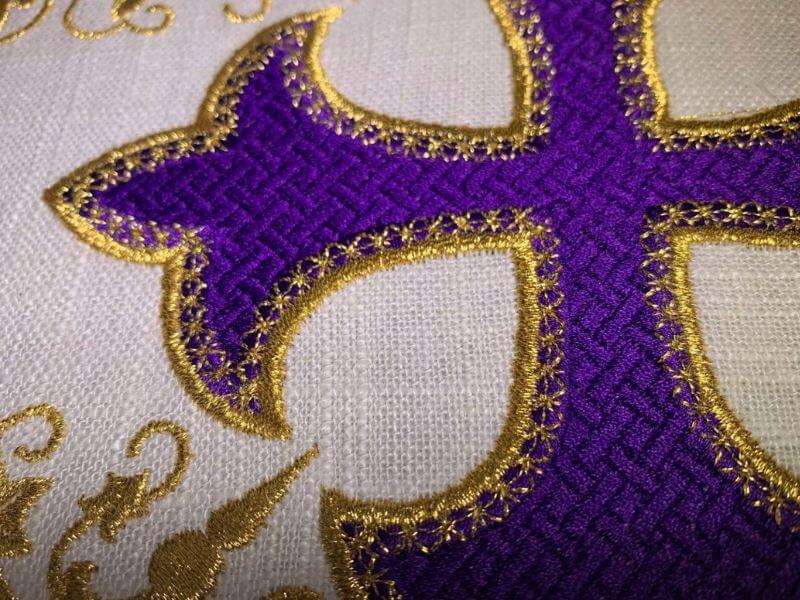
The possibilities are endless, and you can create your own using your embroidery digitizing software.
Motif Fills in Embroidery
Motif fills are made with running stitches. One popular style looks like the traditional Japanese embroidery called sashiko. Originally developed for mending clothes, sashiko uses simple running stitches to create beautiful, decorative patterns.
To create an amazing embossed fill simply create an object and then change the fill to an embossed fill.
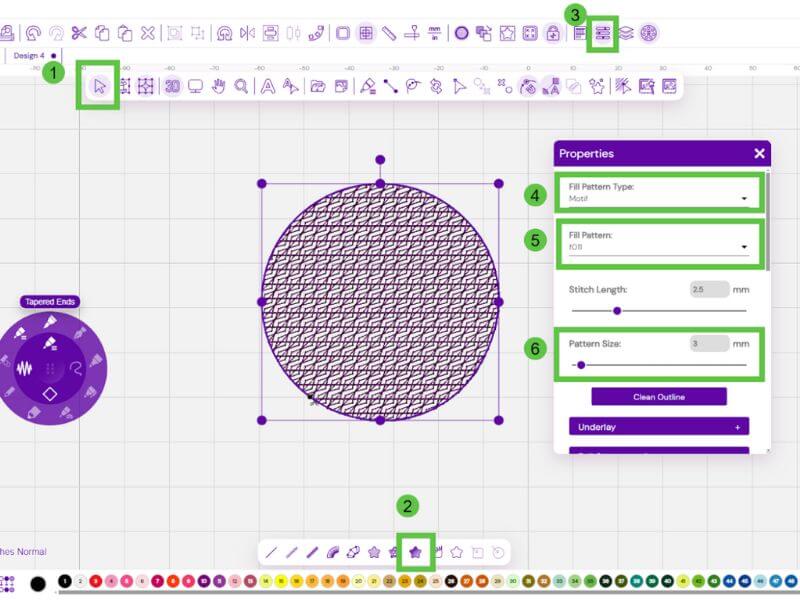
- Select your object
- Choose the Fancy Fill option
- Open your properties tool
- Select Motif fill
- Choose your fill pattern
- Play around with the size of your fill- you can get amazing results
Here is the stitch out:
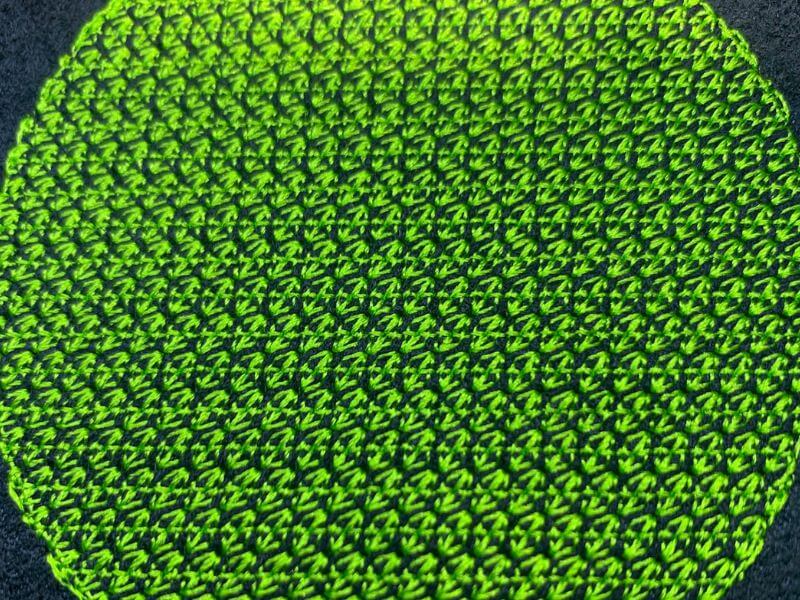
You can create a filled object and then switch that fill to a “motif” pattern. Motifs are small, repeating elements used to fill the design.
As these motifs approach the edge of the design, they are trimmed to maintain a smooth, uninterrupted shape. You can customize the motifs by adjusting their size, spacing, and placement to fit your design perfectly.
Tips for Fill Stitches in Machine Embroidery
Here are some tips for creating better fills for your embroidery:
- Think satin for smaller, tatami for larger.
- Combine fills in different designs for a beautiful contrast.
- Always stitch out a sample on a material similar to your finished product.
- Change the stitch angle and experiment with stamping, embossing, and more.
Experiment with these techniques to find the perfect fit for your next creation and enhance your embroidery skills like never before!
P.S. Check out our Embroidery Legacy Digitizer Software—your next-level embroidery journey starts here!
